
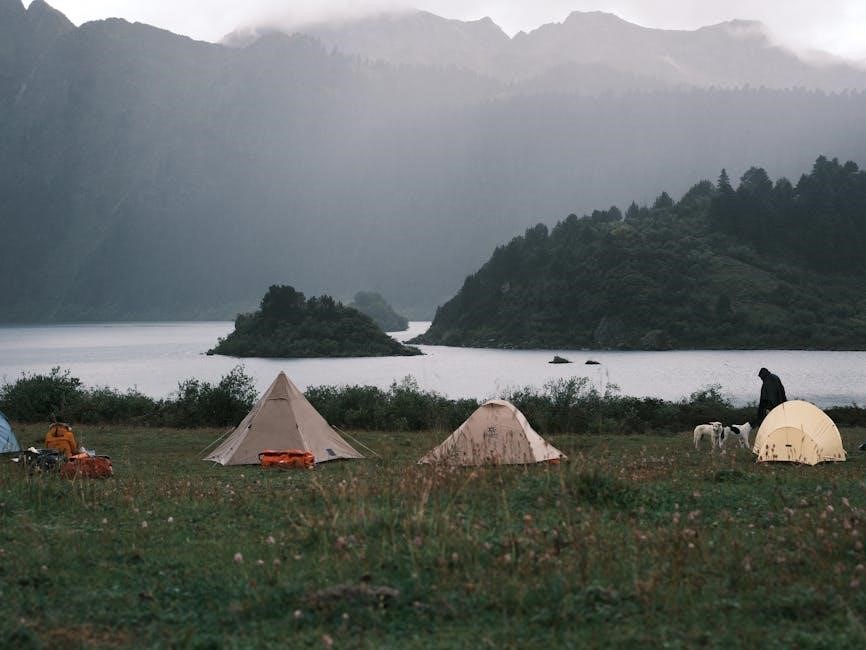
Planning an event? A 10×30 tent offers ample space! This guide simplifies setup‚ ensuring a secure and enjoyable experience for 30-50 guests․
Master your tent with our step-by-step instructions‚ avoiding common errors and ensuring a swift‚ stress-free setup for any occasion․
Why a Detailed Guide is Important
Successfully erecting a 10×30 tent demands precision; a comprehensive guide is crucial for avoiding frustrating setbacks and ensuring structural integrity․ Without clear instructions‚ even seemingly simple steps can lead to instability‚ potentially compromising safety during your event․
Detailed guides minimize errors‚ saving valuable time and effort․ They empower users to confidently tackle assembly‚ even without prior experience․ Furthermore‚ understanding proper setup techniques extends the tent’s lifespan‚ protecting your investment․
Our guide provides step-by-step clarity‚ referencing diagrams and videos for enhanced comprehension‚ and offers troubleshooting advice to address common issues‚ guaranteeing a secure and enjoyable experience for all attendees․
Safety Precautions Before You Begin
Prioritize safety during tent setup! Always inspect all components for damage before starting․ Work with at least two people – a 10×30 tent is large and unwieldy․ Clear the installation area of any potential hazards like rocks‚ branches‚ or underground utilities․
Be mindful of overhead power lines․ Never erect a tent directly beneath them․ Wear appropriate footwear – closed-toe shoes are essential․ Secure the tent properly‚ especially in windy conditions‚ using ropes and stakes‚ and consider ground anchors for added stability․
Read the manufacturer’s manual thoroughly before beginning․ Ignoring warnings can lead to structural failure and potential injury․
Understanding Your 10×30 Tent Components
Familiarize yourself with the canopy‚ legs‚ frame‚ sidewalls‚ ropes‚ stakes‚ and connectors․ Knowing each part is crucial for a smooth‚ successful setup process․
Tent Canopy (Top Cover)
The tent canopy‚ or top cover‚ is typically made of durable‚ waterproof material like polyethylene or PVC-coated polyester․ Inspect it for any tears or damage before beginning assembly․
Proper tensioning is vital; sagging can lead to water pooling and structural weakness․ Securely attaching the canopy to the frame using provided straps or clips is essential․
Consider the canopy’s weight – larger canopies require more support․ Ensure adequate coverage and overlap when connecting multiple canopy sections․ A well-maintained canopy protects against the elements and extends the tent’s lifespan․
Tent Legs & Frame
The tent’s legs and frame‚ often constructed from steel or aluminum‚ provide the structural foundation․ Carefully assemble leg sections‚ ensuring secure connections using buttons‚ pins‚ or connectors․
Raising the frame requires a coordinated effort; lift gradually and check for stability at each stage․ Inspect all joints and connections for tightness before proceeding․
A sturdy frame is crucial for withstanding wind and weather․ Properly assembled legs distribute weight evenly‚ preventing collapse․ Reinforce critical points with additional supports if necessary for enhanced durability․
Side Walls & Doors
Attaching side walls to the tent frame typically involves Velcro‚ clips‚ or ties․ Ensure a snug fit to prevent drafts and maintain structural integrity․ Doors and windows enhance accessibility and ventilation; install them securely‚ checking zippers and closures․
Properly secured side walls contribute significantly to the tent’s stability‚ especially in windy conditions․ Consider using additional ropes or straps to reinforce attachment points․
Inspect all seams and fasteners for wear and tear․ Regularly check door and window mechanisms for smooth operation‚ ensuring a comfortable and protected environment․
Ropes & Stakes
Attaching ropes to the tent frame’s designated anchor points is crucial for stability․ Use durable ropes and ensure they are securely knotted․ Properly staking the tent involves driving stakes at a 45-degree angle away from the tent‚ creating a firm hold․
Adjusting rope tension is vital; ropes should be taut but not overly strained․ Regularly inspect stakes for looseness‚ especially during inclement weather․ Consider using heavier-duty stakes for challenging ground conditions․
Reinforcing with additional stakes and ropes provides extra security‚ particularly in windy environments․
Connectors & Fasteners
Inspect all connectors and fasteners before assembly; ensure they are present and undamaged․ Utilize the correct fasteners for each connection point‚ as specified in the tent’s instruction manual․ Properly tighten all bolts‚ screws‚ and clips to create a secure frame․
Double-check connections after initial assembly and periodically throughout the event․ Avoid over-tightening‚ which can strip threads or damage components․ Pay close attention to corner connectors‚ as these bear significant stress․
Replacing any damaged or missing connectors is essential for maintaining tent integrity and safety․

Site Preparation for Tent Installation
Select a level surface‚ clear of obstructions and underground utilities․ Ensure adequate space for the 10×30 tent and anchoring ropes for a stable setup․
Choosing a Level Surface
Selecting a truly level surface is paramount for a safe and structurally sound 10×30 tent installation․ Even a slight incline can cause instability‚ potentially leading to collapse‚ especially with wind or heavier loads․ Carefully inspect the chosen area‚ utilizing a level if necessary‚ to identify and address any significant slopes․
Minor imperfections can often be compensated for during the anchoring phase‚ but substantial unevenness requires pre-emptive leveling․ This might involve adding fill dirt to low spots or carefully removing material from high areas․ Prioritizing a flat foundation ensures the tent frame distributes weight evenly‚ maximizing stability and preventing unwanted stress on the components․ A solid‚ level base is the cornerstone of a successful setup․
Checking for Underground Utilities
Before commencing any tent setup‚ diligently check for buried utilities – gas lines‚ electrical cables‚ water pipes‚ and communication lines․ Contacting your local utility companies is crucial; they can often mark the locations of underground services free of charge․ Ignoring this step poses a severe safety risk‚ potentially causing damage to vital infrastructure and endangering personnel․
Look for visible indicators like utility markers or access points․ Avoid areas near these signs․ If you suspect the presence of underground utilities‚ even without visible markers‚ proceed with extreme caution and consider alternative locations․ Prioritizing safety and preventing accidental damage is non-negotiable during tent installation․
Clearing the Area of Obstructions
Prior to tent setup‚ thoroughly clear the designated 10×30 area of all obstructions․ Remove rocks‚ roots‚ branches‚ and any debris that could damage the tent fabric or impede a level setup․ Ensure the ground is free from sharp objects that might puncture tent components or pose a hazard to those inside․
Inspect for low-hanging branches or overhead wires that could interfere with the tent’s height․ Address any potential tripping hazards․ A clean‚ unobstructed surface is essential for a safe‚ stable‚ and properly installed tent‚ maximizing space and minimizing risks during your event․
Step-by-Step Tent Assembly: The Frame
Begin by assembling the leg sections‚ then connect the frame pieces securely․ Carefully raise the frame‚ ensuring stability before proceeding with canopy attachment․
Assembling the Leg Sections
Start by laying out all the leg sections of your 10×30 tent frame․ Typically‚ these come in multiple pieces that need to be connected to achieve the desired height․ Locate the connectors – often push-button or pin-lock style – and insert the sections firmly until you hear a click or feel a secure connection․
Ensure each leg section is fully locked into place before moving on․ Repeat this process for all four legs‚ verifying that each leg assembly is of equal length․ Uneven legs will cause instability during the overall tent setup․ Double-check all connections for a solid‚ reliable base for your tent structure․
Connecting the Frame Pieces
With the leg sections assembled‚ begin connecting the horizontal frame pieces – the top rails and side rails – to form the tent’s rectangular base․ Utilize the provided connectors‚ ensuring a snug fit at each corner․ Pay close attention to the orientation of the frame pieces; some may be specifically designed for certain positions․
Securely fasten all connections‚ verifying the frame is square and stable․ A wobbly frame indicates loose connections that need immediate attention․ This foundational step is crucial for the tent’s overall structural integrity‚ so take your time and double-check everything․
Raising the Frame
With the frame connected‚ carefully begin raising it into its upright position․ This is best accomplished with at least two people to ensure stability and prevent damage․ Lift slowly and evenly‚ guiding the frame upwards while maintaining control․
As the frame rises‚ ensure all connections remain secure and that no pieces are bending or buckling․ Once fully upright‚ temporarily brace the frame with ropes or stakes to prevent it from collapsing before the canopy is attached․ Confirm the frame is level and square before proceeding to the next step․

Attaching the Tent Canopy
Carefully position the canopy over the raised frame‚ aligning corners and edges․ Secure it using provided fasteners‚ ensuring proper tension for a waterproof seal․
Positioning the Canopy Over the Frame
Begin by carefully unfolding the tent canopy‚ laying it out adjacent to the fully assembled frame․ With assistance‚ gently lift the canopy and begin draping it over the frame structure․ Ensure the canopy is centered‚ allowing equal overhang on all sides․
Align the canopy’s corner pockets or attachment points with the corresponding frame corners․ This initial positioning is crucial for even tension and a secure fit․ Take your time during this step; misaligned positioning can lead to difficulties during the securing phase․
Double-check that the canopy isn’t twisted or snagged before proceeding․ A smooth‚ even drape is the goal‚ setting the stage for a stable and weatherproof shelter․
Securing the Canopy to the Frame
Once positioned‚ secure the canopy to the frame using the provided clips‚ straps‚ or Velcro fasteners․ Start with the corners‚ firmly attaching them to the frame’s designated points․ Work your way around the perimeter‚ ensuring each attachment point is securely fastened․
Pay close attention to the canopy’s tension as you secure it․ It should be taut but not overly stretched‚ preventing sagging or damage․ Even tension distribution is key for stability‚ especially in windy conditions․
Inspect all connections to confirm they are properly engaged․ A secure canopy is vital for protecting your event from the elements and ensuring the tent’s overall structural integrity․
Ensuring Proper Canopy Tension
Achieving correct canopy tension is crucial for a stable and visually appealing tent․ Avoid excessive tightness‚ which can strain the frame and fabric‚ leading to damage․ Conversely‚ a loose canopy will sag and be vulnerable to wind․
Check for wrinkles or dips in the canopy fabric; these indicate uneven tension․ Adjust the attachment points – clips‚ straps‚ or Velcro – to redistribute the tension until the canopy is smooth and taut․
Consistent tension across the entire canopy ensures optimal performance and longevity․ Regularly inspect and readjust tension‚ especially after initial setup or exposure to weather changes․
Installing Side Walls and Doors
Secure side walls to the frame using clips or Velcro‚ ensuring a snug fit․ Install doors and windows‚ then reinforce for stability and weather protection․
Attaching Side Walls to the Frame
Begin by carefully aligning the side wall panels with the tent frame‚ ensuring the edges are flush․ Most 10×30 tents utilize either clips‚ Velcro straps‚ or a combination of both to secure the walls․ Start at a corner and work your way along the frame‚ attaching the wall incrementally․
Pay close attention to the orientation of the wall – some panels may have specific sides designated for left or right placement․ Ensure each attachment point is firmly secured to prevent the walls from loosening in windy conditions; Proper attachment is crucial for overall tent stability and weather resistance․ Double-check all connections before proceeding to the next step․
Installing Doors and Windows
Once the side walls are attached‚ focus on installing doors and windows․ Typically‚ these components feature zippers or Velcro closures for easy access and ventilation․ Begin by aligning the door or window frame with the corresponding opening in the side wall․
Secure the top of the door/window first‚ then work your way down the sides‚ ensuring a snug fit․ Check that zippers or Velcro closures operate smoothly without snagging․ Properly functioning doors and windows enhance usability and airflow within the tent․ Confirm all fasteners are engaged to prevent unwanted openings during use․
Securing Side Walls for Stability
After attaching the side walls‚ prioritize securing them for optimal stability‚ especially in windy conditions․ Utilize the provided straps‚ buckles‚ or Velcro fasteners to connect the walls firmly to the tent frame․ Ensure each attachment point is properly engaged‚ distributing tension evenly along the wall’s length․
Reinforce connections by checking for any slack and adjusting straps accordingly; Consider using additional ropes or bungee cords for extra security‚ particularly if anticipating strong winds․ A well-secured side wall significantly enhances the tent’s overall structural integrity and prevents billowing or detachment․

Anchoring the Tent: Ropes and Stakes
Secure your 10×30 tent with ropes and stakes! Attach ropes to the frame and stake firmly into the ground‚ adjusting tension for maximum stability;
Attaching Ropes to the Tent Frame
Begin by securely attaching ropes to the designated anchor points on your 10×30 tent frame․ These points are typically located along the canopy’s edges or on the frame’s legs․ Utilize durable ropes designed for outdoor use‚ ensuring they are long enough to reach a sufficient distance from the tent․
Employ a reliable knot‚ such as a bowline or a taut-line hitch‚ to firmly connect the ropes to the frame․ Avoid knots that may slip or weaken under tension․ Inspect each connection to confirm it’s secure before proceeding․ Proper rope attachment is crucial for distributing stress and preventing tent movement in windy conditions‚ ultimately safeguarding your event․
Properly Staking the Tent to the Ground
Drive stakes into the ground at a 45-degree angle‚ pointing away from the tent․ This maximizes holding power․ Ensure stakes are firmly embedded‚ leaving only a few inches exposed․ For softer ground‚ consider using longer or wider stakes‚ or even ground anchors for enhanced stability․
Attach the ropes to the stakes‚ creating tension that pulls the tent taut․ Avoid over-tightening‚ which can stress the frame․ Regularly check stake placement‚ especially during inclement weather․ Secure staking is paramount for preventing tent lift-off or shifting‚ ensuring a safe and enjoyable event for all attendees․
Adjusting Rope Tension for Stability
Even rope tension is crucial for a stable 10×30 tent․ Start by tightening each rope incrementally‚ working your way around the tent․ Avoid creating excessive tension on any single rope‚ as this can distort the frame․ Look for a balanced pull‚ ensuring the canopy is taut and wrinkle-free․
Monitor the tent during setup and throughout the event‚ re-adjusting ropes as needed․ Wind can significantly impact tension‚ requiring periodic checks․ Proper tension distributes stress evenly‚ preventing damage and maximizing the tent’s resistance to the elements‚ guaranteeing a secure structure․

Troubleshooting Common Setup Issues
Encountering problems? Uneven ground‚ canopy sagging‚ or loose connections are common․ Solutions include shimming‚ re-tensioning‚ and verifying all fasteners are secure․
Dealing with Uneven Ground
Setting up on imperfect terrain is frequent․ First‚ identify low spots; use shims – wood‚ rocks‚ or even packed soil – under the tent legs to level the frame․
Alternatively‚ slightly loosen leg connections‚ allowing for minor adjustments․ Ensure all legs maintain equal height․ For significant slopes‚ consider relocating the tent if possible․
Prioritize a stable base; an unleveled tent compromises safety and structural integrity․ Regularly check leg stability during the event‚ especially after weather changes․ Remember‚ a level tent is a safe tent!
Don’t underestimate the importance of a solid foundation for your 10×30 structure․
Addressing Canopy Sagging
Canopy sagging often occurs after rain or with prolonged use․ First‚ retighten all canopy connections to the frame – straps‚ clips‚ or Velcro․ Ensure even tension across the entire canopy surface․
If sagging persists‚ add support poles in the center of the canopy‚ creating a peak․ These can be adjustable poles designed for tents or sturdy‚ appropriately sized alternatives․
Regularly inspect the canopy fabric for water pooling; gently lift sagging areas to drain excess water․ Preventative measures‚ like proper tensioning during setup‚ minimize sagging․ A taut canopy improves appearance and water runoff․
Remember‚ a well-maintained canopy extends your tent’s lifespan․
Fixing Loose Connections
Loose connections compromise tent stability; address them immediately․ Begin by identifying all points where frame sections join – legs‚ connectors‚ and canopy attachments․ Tighten screws‚ bolts‚ or pins using appropriate tools‚ but avoid over-tightening․
If clips or Velcro straps are loose‚ re-secure them firmly․ Inspect for damaged connectors; replace any cracked or broken parts․ Carry a basic repair kit with spare fasteners․
Regularly check connections‚ especially after setup and during events․ Reinforce critical joints with duct tape as a temporary fix‚ but prioritize proper replacement․ A secure frame ensures safety and longevity․
Consistent maintenance prevents escalating issues․

Maintaining Your 10×30 Tent
Regular cleaning and proper storage extend your tent’s life! Inspect for damage after each use‚ ensuring longevity and readiness for future events․
Cleaning the Tent Canopy and Frame
Maintaining a clean tent is crucial for longevity․ After each use‚ thoroughly inspect the canopy for dirt‚ debris‚ and mildew․ Gentle washing with mild soap and water is recommended; avoid harsh chemicals or abrasive cleaners that could damage the material․
For the frame‚ wipe down metal parts with a damp cloth to prevent rust․ Pay attention to connectors and joints‚ ensuring they are free of dirt and grime․ Allow both the canopy and frame to completely dry before storing to prevent mold growth․ Regular cleaning ensures your tent remains in top condition for years to come!
Proper Storage Techniques
Correct storage significantly extends your tent’s lifespan․ Ensure the canopy and frame are completely dry before packing to prevent mildew․ Store in a cool‚ dry‚ and well-ventilated area‚ away from direct sunlight and extreme temperatures․
Avoid prolonged exposure to moisture or pests․ Consider using a breathable storage bag to allow air circulation․ Keep all components together – canopy‚ frame‚ ropes‚ and stakes – for easy setup next time․ Properly stored‚ your 10×30 tent will be ready for countless events!
Inspecting for Damage
Regular inspections are crucial for safety and longevity․ Thoroughly examine the canopy for tears‚ punctures‚ or fading․ Check the frame for bends‚ rust‚ or broken connectors․ Inspect ropes and stakes for wear and tear‚ replacing any damaged items immediately․
Pay close attention to stress points and seams․ Address minor repairs promptly to prevent them from escalating․ A damaged tent can be a safety hazard‚ especially in windy conditions․ Consistent inspection ensures your 10×30 tent remains reliable and secure for every event․

Advanced Tips for Secure Setup
Enhance stability with ground anchors or sandbags‚ especially in windy areas․ Reinforce your 10×30 tent for maximum wind resistance and event safety!
Using Ground Anchors for Extra Stability
For enhanced security‚ particularly on softer ground or during anticipated windy conditions‚ consider utilizing ground anchors․ These robust anchors provide a significantly stronger hold compared to standard tent stakes․
Drive the anchors at a 45-degree angle away from the tent‚ ensuring they are fully embedded into the earth․ Connect the tent ropes securely to the anchor loops‚ and adjust tension to distribute weight evenly․
Different anchor types are available – spiral‚ duckbill‚ or plate anchors – choose based on soil composition․ Proper anchor placement is crucial; avoid rocky areas or locations with underground utilities․ Ground anchors dramatically improve a 10×30 tent’s resistance to uplift and shifting․
Reinforcing with Sandbags
Sandbags offer a simple yet effective method for bolstering tent stability‚ especially when ground anchoring is insufficient or impractical․ Strategically position filled sandbags around the tent legs‚ focusing on corners and areas most vulnerable to wind uplift․
Ensure sandbags are securely sealed and weigh approximately 25-50 pounds each for optimal effectiveness․ Distribute the weight evenly around the tent perimeter‚ avoiding direct pressure on the tent fabric․
Sandbags are particularly useful on hard surfaces like concrete or asphalt where staking isn’t possible․ Combining sandbags with standard staking or ground anchors provides a multi-layered defense against strong winds‚ ensuring a safer event environment․
Wind Resistance Strategies
Prioritize tent orientation; position the narrowest side facing prevailing winds to minimize surface area exposure․ Secure all sidewalls completely‚ utilizing Velcro or clips‚ eliminating gaps where wind can enter and lift the canopy․
Regularly inspect ropes and stakes‚ tightening as needed to maintain tension․ Consider using higher-quality‚ heavy-duty stakes designed for stronger holding power․ Reinforce corners with additional guylines for enhanced stability․
Never leave a tent unattended in windy conditions․ If winds escalate significantly‚ consider dismantling the tent to prevent damage or injury․ Combining multiple strategies offers the best protection․