
Bontrager RIDEtime Manual: A Comprehensive Guide
This manual provides detailed instructions for the Bontrager RIDEtime Elite, covering setup, operation, and troubleshooting—ensuring optimal performance and enjoyment during every cycling adventure․
The RIDEtime Elite is an elegant, simple-to-use ANT+ cycling computer with a large, easy-to-read screen, designed to enhance your riding experience․
Welcome to the world of enhanced cycling with the Bontrager RIDEtime Elite! This computer isn’t just a device; it’s your companion for achieving cycling goals, whether you’re focused on productive workouts, leisurely recovery rides, or simply enjoying the journey․ Designed with simplicity and intuitiveness in mind, the RIDEtime Elite seamlessly integrates into your riding experience․
The RIDEtime Elite stands out as an elegant ANT+ cycling computer, boasting an exceptionally easy setup process․ Its large, clear screen ensures effortless readability, even during dynamic rides․ It’s engineered to pair effortlessly with compatible ANT+ sensors, delivering real-time data on speed, cadence, and power․ This allows you to precisely target your training efforts and optimize recovery․
Many users, like those sharing experiences with the FXS model, highlight the computer’s reliable connectivity and straightforward functionality․ Beyond performance tracking, the RIDEtime Elite also offers smart integration with Bontrager lights, automatically activating them as you begin your ride, adding an extra layer of safety and convenience․
What is the Bontrager RIDEtime Elite?
The Bontrager RIDEtime Elite is a sophisticated yet user-friendly cycling computer designed to elevate your ride experience․ It’s an ANT+ enabled device, meaning it wirelessly communicates with a range of compatible sensors to provide crucial performance data․ Think of it as a central hub for understanding your cycling metrics, presented on a large, easily readable screen․
Unlike complex, feature-heavy computers, the RIDEtime Elite prioritizes simplicity․ It’s built for riders who want essential data – speed, cadence, and potentially power (with compatible sensors) – without a steep learning curve․ This makes it ideal for both beginners and experienced cyclists seeking a streamlined experience․
Users appreciate its ability to seamlessly integrate with other Bontrager accessories, such as lights, offering automated activation for enhanced safety․ It’s a tool focused on providing actionable insights, helping you target workouts, monitor progress, and ultimately, enjoy your time on the bike more effectively․
Key Features and Benefits
The Bontrager RIDEtime Elite boasts several key features designed for optimal cycling performance․ Intuitive operation ensures ease of use, even mid-ride, while the large, clear screen guarantees effortless data visibility․ ANT+ connectivity allows seamless pairing with speed, cadence, and power sensors for comprehensive tracking․
Beyond data display, a significant benefit is its compatibility with Bontrager lights, enabling automatic activation upon ride start – enhancing safety and convenience․ The computer’s simplicity translates to a quick setup process, getting you on the road faster․
Furthermore, the RIDEtime Elite empowers riders to target productive workouts and monitor recovery effectively․ Its focus on essential metrics provides actionable insights without overwhelming complexity․ It’s a reliable, user-friendly tool for cyclists of all levels seeking to improve their riding experience and achieve their fitness goals․

Setting Up Your RIDEtime Elite
Proper setup is crucial for maximizing the RIDEtime Elite’s functionality; this section details unboxing, mounting, sensor installation, and initial configuration procedures for optimal use․
Unboxing and Component Check
Upon receiving your Bontrager RIDEtime Elite, carefully open the packaging and verify all components are present․ You should find the RIDEtime Elite computer unit itself, a handlebar mount, a speed sensor, a cadence sensor, and potentially cable ties for neat wire management․
Inspect each item for any physical damage incurred during shipping․ Ensure the computer screen is free from scratches and the sensors appear intact․ Confirm the handlebar mount is securely fastened and compatible with your bicycle’s handlebar diameter․
Cross-reference the included contents with the parts list in this manual․ If any components are missing or damaged, immediately contact Bontrager customer support for assistance and replacement options․ Do not attempt to operate the computer with missing or faulty parts, as this could affect its performance and accuracy․ A thorough component check ensures a smooth setup process․
Mounting the Computer to Your Handlebar
Begin by selecting a suitable location on your handlebar for the RIDEtime Elite․ Ensure the chosen spot provides a clear, unobstructed view of the screen while riding and allows for comfortable access to the buttons․
Attach the handlebar mount by wrapping the included O-rings securely around your handlebar․ Tighten the mount firmly, but avoid over-tightening, which could damage the handlebar or mount․ Verify the mount is stable and doesn’t wobble․
Slide the RIDEtime Elite computer unit onto the mounted bracket․ It should click into place securely․ Test the stability by gently pressing on the computer to ensure it’s firmly attached․ Adjust the angle of the computer on the mount to optimize visibility․ Proper mounting is crucial for safe and reliable data display during your rides․
Installing the Speed Sensor
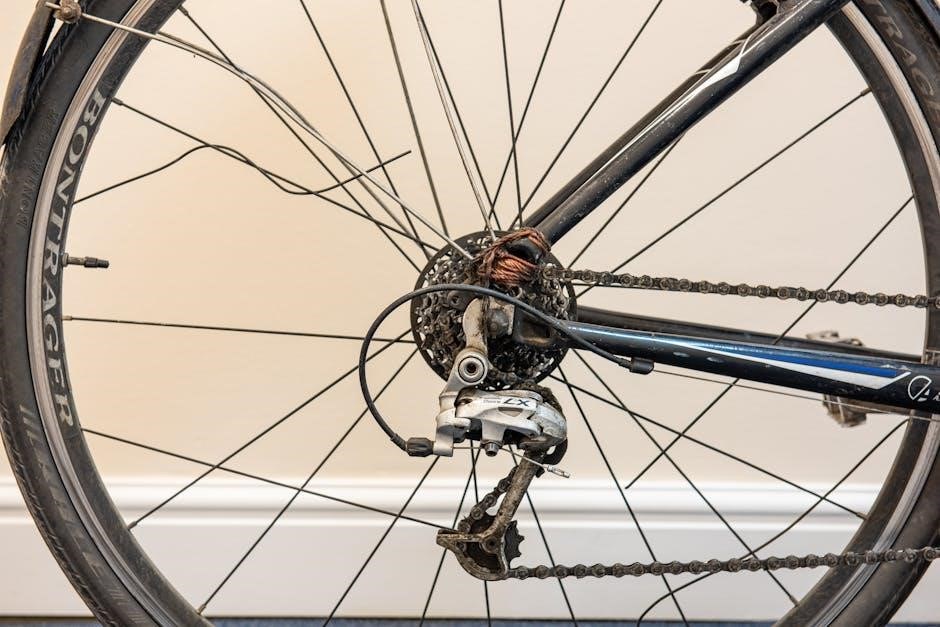
Locate the front wheel fork and identify a suitable mounting point for the speed sensor․ The ideal position is on the fork leg, ensuring the sensor is close to the wheel and doesn’t interfere with braking or steering․
Clean the mounting surface thoroughly with a clean cloth to remove any dirt or debris․ This ensures a strong and secure attachment․ Attach the speed sensor using the provided strap or O-ring․ Position the sensor so it’s facing the wheel’s spokes, with a gap of approximately 3-5mm between the sensor and the spoke magnet․
Secure the magnet to a spoke, aligning it to pass close to the sensor during each wheel rotation․ Double-check the alignment and ensure the sensor is firmly attached before your ride․ Proper installation guarantees accurate speed readings․
Installing the Cadence Sensor
Locate the crank arm of your bicycle and identify a suitable mounting point for the cadence sensor․ Ensure the chosen location doesn’t obstruct pedaling motion or contact other bike components․
Clean the crank arm surface thoroughly with a clean cloth to remove any dirt or grease․ This is crucial for a secure and reliable attachment․ Attach the cadence sensor using the provided strap or adhesive mount, depending on your crank arm type․
Position the sensor so it accurately detects the rotation of the crank arm․ Ensure it’s aligned correctly and securely fastened before commencing your ride․ A properly installed cadence sensor provides precise data for optimizing your cycling performance and tracking your effort․
Pairing Sensors and Initial Configuration
Successfully connect your RIDEtime Elite to compatible ANT+ sensors for real-time data, then configure essential settings like time, date, and wheel size for accurate tracking․
Pairing with ANT+ Sensors
The RIDEtime Elite seamlessly integrates with ANT+ enabled sensors, providing crucial ride data․ To initiate pairing, ensure your sensors are in pairing mode – typically activated by a button press or removal and reinsertion of the battery․
On the computer, navigate to the sensor pairing menu․ The computer will begin searching for nearby ANT+ signals․ Once your sensor appears on the list, select it to establish a connection․ A successful pairing is usually indicated by a confirmation message on the display and a stable sensor icon․
You can pair multiple sensors, including speed, cadence, and power meters․ Repeat the pairing process for each sensor․ Remember that the computer can store pairing information for several sensors, allowing for quick reconnections during future rides․ If a sensor fails to pair, verify its battery and ensure it’s within range of the computer․
Setting the Time and Date
Accurate time and date settings are essential for correct ride data recording․ To set the time on your RIDEtime Elite, access the settings menu using the computer’s buttons․ Navigate to the ‘Time/Date’ option․ You may be presented with options to set the hour, minute, and AM/PM or 24-hour format․
Use the buttons to adjust each value until it reflects the current time․ Similarly, adjust the date settings – month, day, and year – to ensure accuracy․ Some models may allow connection to a computer via USB for simplified time synchronization․
Confirm your settings to save them․ Incorrect time settings can lead to inaccurate timestamps on your ride data, affecting analysis and comparisons․ Regularly check and update the time, especially after traveling across time zones․
Wheel Size Calibration
Precise wheel size calibration is crucial for accurate speed and distance measurements․ The RIDEtime Elite requires this information to correctly calculate your cycling metrics․ Access the settings menu using the computer’s buttons and locate the ‘Wheel Size’ option․
You’ll typically be prompted to enter your wheel diameter in millimeters․ This value depends on your tire size; consult your tire sidewall for the information․ Alternatively, some models allow you to select a pre-defined wheel size from a list․
Ensure the entered value matches your actual wheel size for optimal accuracy․ Incorrect calibration will result in inaccurate speed and distance readings․ Regularly verify the wheel size, especially after changing tires; Accurate calibration enhances the reliability of your ride data and performance analysis․

Understanding the Display and Buttons
The RIDEtime Elite features a clear display showing essential data fields, navigated using intuitive buttons—allowing effortless control and customization of your ride information․
Display Overview: Data Fields
The Bontrager RIDEtime Elite’s display is designed for quick and easy readability while cycling․ The primary screen showcases current speed, a crucial metric for monitoring your pace and performance․ Alongside speed, the display prominently features cadence, measured in revolutions per minute (RPM), helping you optimize pedaling efficiency and maintain a consistent rhythm․
For riders utilizing compatible sensors, the computer can also display real-time power data, providing insights into your exertion levels․ The screen dynamically updates, presenting information clearly and concisely․ Users can customize the data fields shown, prioritizing the metrics most relevant to their training goals or ride preferences․ The large, easy-to-read format ensures information is accessible at a glance, minimizing distractions and maximizing focus on the road ahead․ The display’s brightness is optimized for visibility in various lighting conditions, enhancing usability in both sunny and shaded environments․
Button Functions: Navigating the Menu
The Bontrager RIDEtime Elite utilizes a simple, intuitive button system for effortless menu navigation․ Typically, a single button or a combination of two buttons controls all functions․ A short press often cycles through the available data screens during a ride, allowing quick access to speed, cadence, or other displayed metrics․
To access the main menu for settings adjustments, a longer press of the button is usually required․ Within the menu, repeated presses navigate through options like time/date settings, wheel size calibration, and sensor pairing․ Selecting an option often involves a button press and hold․ Returning to the main ride screen is typically achieved by pressing and holding the button again․ The system is designed to be operated while riding, minimizing the need to remove your hands from the handlebars․ Familiarizing yourself with these basic functions ensures seamless control and customization of your RIDEtime Elite․
Customizing Data Screens
The Bontrager RIDEtime Elite allows riders to personalize their display, showcasing the most relevant cycling data․ Access the menu, typically via a long button press, and navigate to the ‘Display Settings’ or similar option․ Here, you can rearrange the order of data fields shown on each screen․
Commonly customizable fields include current speed, average speed, maximum speed, cadence, ride time, and distance․ You can often create multiple data screens, each tailored to specific riding phases – one for general riding, another for focused intervals, and so on․ The computer usually supports a limited number of data fields per screen to maintain readability․ Experiment with different configurations to find what best suits your riding style and preferences, ensuring crucial information is always readily visible during your rides․

Using the RIDEtime Elite During a Ride
Start or stop rides easily with dedicated buttons, viewing real-time data like speed and cadence․ The automatic pause/resume function ensures accurate tracking effortlessly․
Starting and Stopping a Ride
Initiating a ride with your Bontrager RIDEtime Elite is a straightforward process․ Simply press the primary button on the computer’s face to begin recording your cycling data․ The display will immediately transition to the active ride screen, showcasing real-time metrics such as speed, distance, and ride time․ A confirmation indicator will visually confirm that the ride has commenced․
To conclude your ride and preserve the recorded data, press the same button again․ The computer will prompt you with an end ride confirmation screen, displaying summary information like total distance, average speed, and ride duration․ Confirming the end of the ride saves the data to the computer’s memory for later review․ Ensure the ride is properly stopped to avoid data loss or inaccuracies․ The intuitive button layout makes starting and stopping rides quick and effortless, even while in motion․
Viewing Real-Time Data

During your ride, the Bontrager RIDEtime Elite displays crucial cycling metrics in real-time․ The large, easy-to-read screen presents data fields such as current speed, average speed, distance traveled, ride time, and cadence (if a cadence sensor is paired)․ Utilize the buttons on the computer to cycle through different data screens and customize the displayed information to suit your preferences․
The computer seamlessly integrates with compatible ANT+ sensors, providing access to additional data like heart rate and power output․ These metrics offer valuable insights into your performance and help you optimize your workouts․ The clear and concise presentation of real-time data allows you to monitor your progress and adjust your effort accordingly, enhancing your overall cycling experience․ Prioritize key metrics for effective training․
Automatic Pause/Resume Functionality
The RIDEtime Elite incorporates a convenient automatic pause/resume feature, designed to accurately track your ride time and distance even during temporary stops․ When your speed drops to zero – for example, at a traffic light or during a brief rest – the computer automatically pauses data recording․ This ensures that only actual riding time is counted towards your statistics․
As soon as you begin pedaling again and your speed exceeds a certain threshold, the computer automatically resumes recording․ This eliminates the need to manually pause and restart the timer, providing a seamless and uninterrupted tracking experience․ This feature is particularly useful for urban cycling or rides with frequent stops and starts, guaranteeing precise and reliable data collection throughout your journey․

Advanced Features and Settings
Explore enhanced capabilities like connecting to Bontrager lights, managing data recording options, and resolving potential connectivity issues for a personalized experience․
Connecting to Bontrager Lights
The RIDEtime Elite seamlessly integrates with compatible Bontrager lights, offering an automated lighting experience for increased safety and convenience․ When paired, your lights will automatically turn on when you start a ride and off when you stop, eliminating the need for manual operation․
To establish a connection, ensure your Bontrager lights are in pairing mode (refer to your light’s manual for specific instructions)․ Within the RIDEtime Elite’s settings menu, navigate to the “Lights” section and initiate the pairing process․ The computer will search for nearby compatible lights․ Once detected, select your light from the list and follow the on-screen prompts to complete the pairing․
Successful pairing will be indicated on the RIDEtime Elite’s display․ You can then customize light settings, such as brightness levels, through the computer’s interface․ This feature enhances visibility and provides peace of mind during both daytime and nighttime rides, making your cycling experience safer and more enjoyable․
Data Recording and Memory Capacity
The Bontrager RIDEtime Elite diligently records key ride data, including speed, cadence, distance, and ride time, allowing you to track your progress and analyze your performance․ This data is stored internally within the computer’s memory, providing a comprehensive record of your cycling activities․
The RIDEtime Elite boasts a substantial memory capacity, capable of storing numerous hours of ride data․ The exact storage duration depends on the frequency of data recording and the number of data fields displayed during each ride․ Generally, you can expect to store weeks or even months of riding information before needing to manage the memory;
To access and review your recorded data, connect the RIDEtime Elite to a compatible computer using a USB cable․ Utilize the Bontrager software (if available) or a compatible third-party application to download and analyze your ride history, providing valuable insights into your cycling performance․
Troubleshooting Connectivity Issues
Experiencing connectivity problems with your Bontrager RIDEtime Elite and sensors? Several factors can disrupt the ANT+ signal․ First, ensure sensors have fresh batteries, as low power significantly impacts connectivity․ Verify sensors are properly paired within the computer’s settings menu – re-pairing often resolves intermittent issues․
Interference from other wireless devices can also cause disruptions․ Move away from potential sources of interference, such as Wi-Fi routers or other Bluetooth-enabled devices․ Ensure a clear line of sight between the computer and sensors, minimizing obstructions․ Check for physical damage to sensors or the computer itself․
If problems persist, try restarting both the computer and the sensors․ Consult the Bontrager support website for frequently asked questions and potential firmware updates․ A factory reset of the computer, as a last resort, may resolve persistent connectivity challenges, but will erase saved data․

Maintenance and Care
Regular cleaning with a damp cloth preserves the RIDEtime Elite’s display and sensors․ Replace batteries promptly when low, and check for available software updates periodically․
Cleaning the Computer and Sensors
Maintaining cleanliness is crucial for the longevity and accurate performance of your Bontrager RIDEtime Elite․ After each ride, or regularly depending on riding conditions, wipe down the computer unit and sensors with a soft, damp cloth․ Avoid using harsh chemicals, solvents, or abrasive cleaners, as these can damage the screen or sensor components․
For stubborn dirt or grime, slightly dampen the cloth with a mild soap solution, ensuring no liquid enters any openings․ Pay particular attention to cleaning the sensor surfaces, as accumulated dirt can interfere with signal transmission․ Ensure the sensors are completely dry before reattaching them to your bike․
Regularly inspect the mounting points for any debris or corrosion, and clean as needed․ Proper cleaning ensures reliable data readings and extends the life of your RIDEtime Elite system․
Battery Replacement
The Bontrager RIDEtime Elite utilizes standard button cell batteries (CR2032) for both the computer unit and the sensors․ Battery life varies depending on usage and environmental conditions, but the computer will display a low battery indicator when replacement is needed․
To replace the battery in the computer, gently pry open the battery compartment on the back of the unit using a small, flathead screwdriver or similar tool․ Remove the old battery and insert the new one, ensuring the correct polarity (+ side up)․ Securely close the battery compartment․
Sensor battery replacement follows a similar process; consult the specific sensor’s documentation for detailed instructions․ Always dispose of used batteries responsibly, following local regulations․ Replacing batteries promptly ensures continuous operation of your RIDEtime Elite․
Software Updates (if applicable)
Currently, the Bontrager RIDEtime Elite operates with a fixed firmware version and does not support over-the-air software updates․ Unlike some modern cycling computers, there is no mechanism for downloading and installing new software revisions directly to the device․
However, Bontrager occasionally releases updated versions of the computer with enhanced features or bug fixes․ To determine if you have the latest version, refer to the product information on the Bontrager website or contact customer support․
If a newer model is available, consider upgrading for access to potential improvements․ Regularly checking the Bontrager support resources will keep you informed about any future software-related advancements for the RIDEtime series․