Thread guides are essential components, directing thread from the spool to the needle, ensuring smooth operation and preventing frustrating issues like thread nesting.
Understanding these guides, and how they function, is crucial for both beginners and experienced sewists, leading to consistent stitch quality and efficient sewing.
What is a Thread Guide?
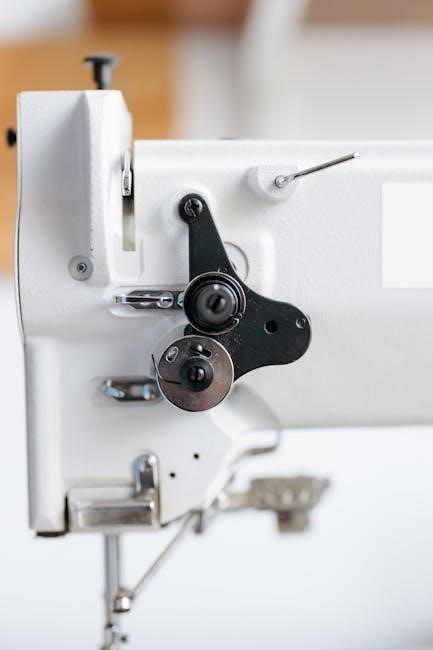
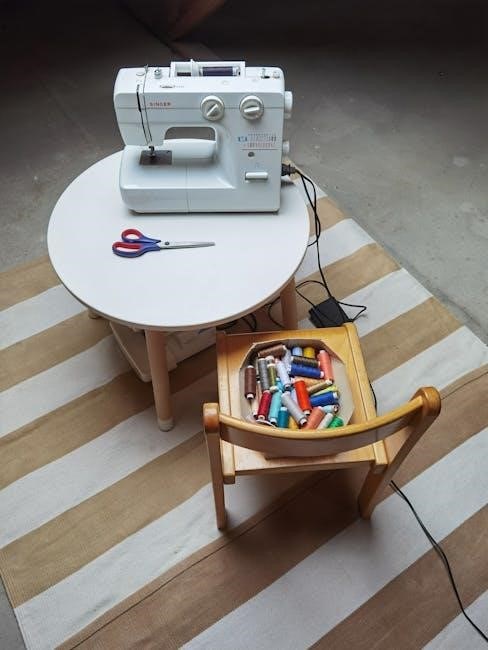
Thread guides are the often-overlooked, yet vitally important, components within a sewing machine responsible for precisely directing the thread’s path. These guides aren’t simply holes or loops; they are carefully engineered elements designed to maintain consistent thread tension and prevent tangling. They come in various forms – small metal loops, ceramic eyes, or even tension discs – strategically positioned along the thread’s journey from the spool to the needle.
Their primary function is to control the thread, ensuring it flows smoothly without snagging or excessive friction. A properly functioning thread guide system is fundamental to achieving even stitches and preventing common sewing problems like thread nests or skipped stitches; Without these guides, the thread would likely become a chaotic mess, rendering the machine unusable.
Why are Thread Guides Important?
Thread guides are critically important because they directly impact stitch quality and sewing efficiency. They maintain consistent thread tension, preventing loops and knots that lead to frustrating thread nests under the fabric. Without proper guidance, the thread can slip, causing skipped stitches and weakening the seam. This is especially crucial when working with delicate fabrics or intricate designs;
Furthermore, correctly functioning thread guides minimize thread breakage, saving time and reducing material waste. They ensure the thread feeds smoothly into the needle, allowing for consistent stitch length and overall project accuracy. Ignoring thread guide issues can quickly turn a pleasurable sewing experience into a source of immense frustration.
Types of Thread Guides
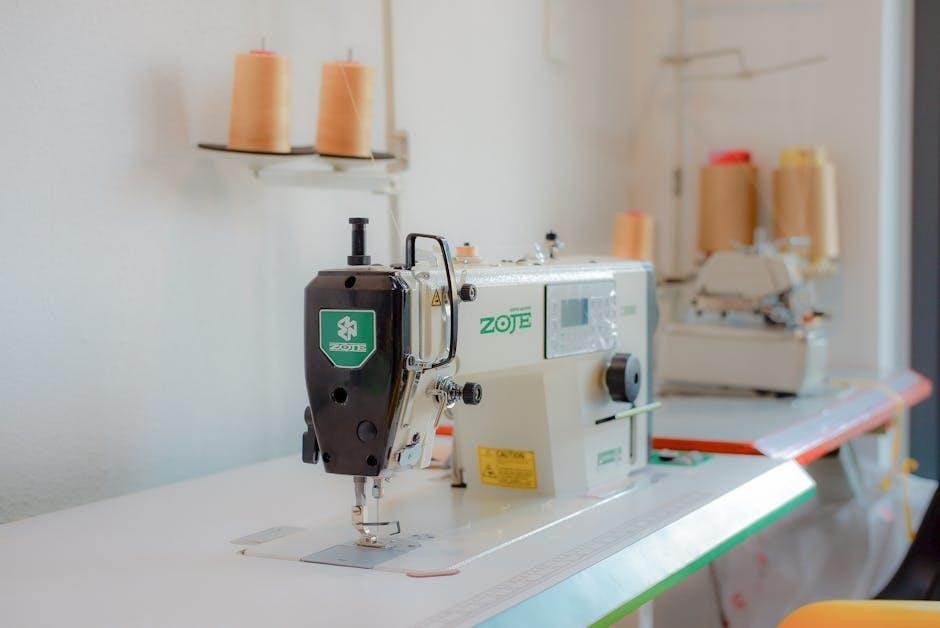
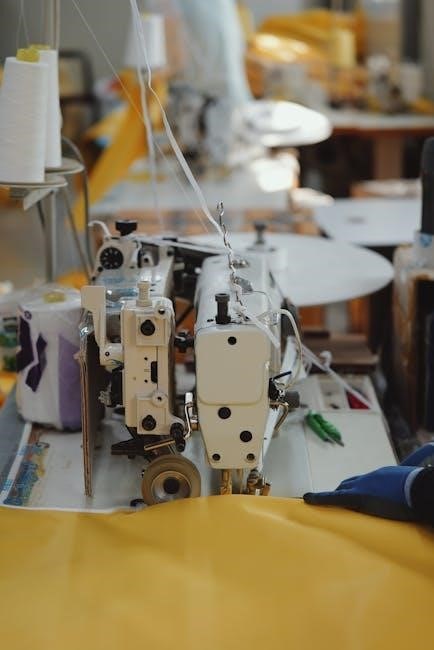
Sewing machines utilize various thread guides – top thread guides, bobbin thread guides, and options that are either built-in or added for specific tasks.
Top Thread Guides
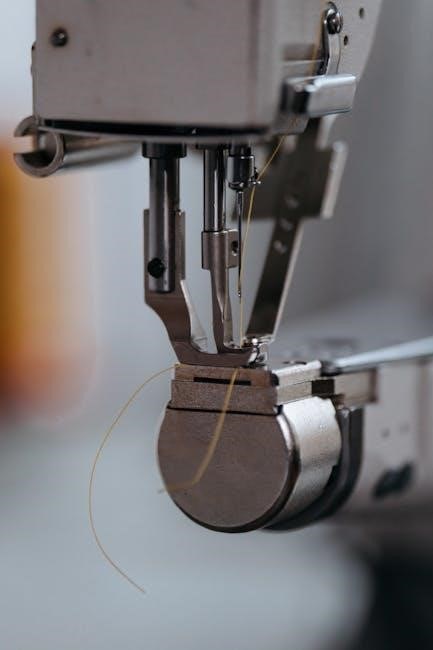
Top thread guides are the most visible and frequently interacted with components of a sewing machine’s threading system. These guides typically begin at the spool pin, directing the thread down through tension discs – crucial for stitch balance – and then through a take-up lever.
The take-up lever’s movement is vital; it pulls thread from the spool, creating consistent tension as it rises and lowers with the needle. Further guides then lead the thread through more tension adjustments and finally to the needle itself. Proper threading through these guides is paramount, as misthreading can cause skipped stitches, thread breakage, or uneven seams. Different machine models feature varying configurations of top thread guides, but the fundamental principle of controlled thread delivery remains constant.
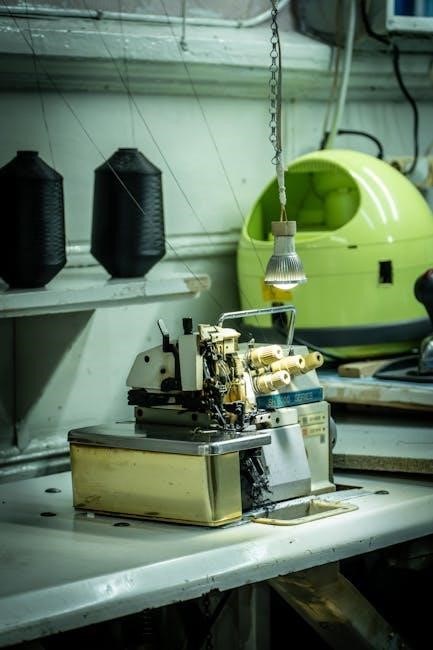
Bobbin Thread Guides
Bobbin thread guides, though less visible, are equally critical for forming a balanced stitch. The bobbin case itself incorporates a tension spring, regulating the thread released as the bobbin unwinds. Before reaching the bobbin case, the thread often passes through a guide that ensures smooth, consistent feeding.
This guide prevents the thread from unraveling unevenly and tangling. The path the bobbin thread takes is designed to interlock perfectly with the top thread, creating the stitch. Incorrect bobbin threading or tension can lead to loops on the underside of the fabric, or a tightly puckered seam. Maintaining a clean and properly threaded bobbin system is essential for achieving professional-quality results.
Built-in vs. Add-on Guides
Sewing machines typically feature built-in thread guides, permanently affixed to the machine’s frame. These are designed specifically for that model and are crucial for proper function. However, add-on guides are available for specialized techniques or to improve thread control. These can include individual guides for specific thread weights or materials, or even magnetic guides that attach temporarily.
Add-on guides are particularly useful when working with delicate fabrics or multiple threads. While built-in guides are generally sufficient for standard sewing, add-ons offer increased precision and customization. Choosing between built-in and add-on guides depends on the complexity of your projects and your desired level of control.

Common Threading Problems
Threading issues, like nesting, skipped stitches, or breakage, often stem from incorrect guide usage or obstructions. Proper threading is vital for smooth sewing.
Thread Nesting Under the Fabric
Thread nesting, a common frustration, occurs when loops of thread accumulate underneath the fabric, creating a tangled mess. This frequently indicates an upper threading problem, often related to the thread guides.
Ensure the thread is correctly seated in all guides – from the spool to the tension discs and finally to the needle. A misaligned or skipped guide can disrupt the thread’s path, causing it to loop and tangle. Incorrect tension, a dull needle, or improper bobbin threading can also contribute. Regularly check each guide for lint or debris, as obstructions impede smooth thread flow. Remember, a properly threaded machine is the first step to avoiding this messy issue!
Skipped Stitches
Skipped stitches, where portions of your seam are missing, can be incredibly frustrating. While several factors contribute, issues with the thread guides are often a primary cause. A thread guide that isn’t properly engaged can lead to inconsistent thread delivery to the needle.
Verify the thread is securely positioned within each guide along the threading path. A slightly displaced thread can cause the loop to be too large for the needle to consistently catch. Also, ensure you’re using the correct needle type for your fabric; a dull or damaged needle exacerbates the problem. Regularly inspect guides for wear and tear, and clean them to remove lint buildup, ensuring smooth thread movement.
Thread Breakage
Thread breakage during sewing is a common annoyance, and often points to friction or stress within the threading path. Thread guides play a critical role here; a rough or damaged guide can abrade the thread, weakening it and causing it to snap. Ensure the thread isn’t being sharply bent or pulled as it passes through each guide.
Inspect guides for burrs or rough edges. Also, confirm you’re using a thread weight appropriate for your needle size and fabric. A too-fine thread can break easily under tension. Regularly cleaning the guides to remove lint and dust minimizes friction, promoting smoother thread travel and reducing the likelihood of breakage.

Threading a Sewing Machine: Step-by-Step
Proper threading, utilizing all thread guides correctly, is vital for consistent stitches. Following your machine’s manual ensures smooth thread flow and optimal performance.
Preparing the Machine
Before threading, ensure your sewing machine is powered off and the presser foot is raised; this releases tension on the thread path. Visually inspect all thread guides – both upper and bobbin – for any lint, dust, or tangled threads. A clean path is paramount for smooth operation and prevents frustrating issues like skipped stitches or thread breakage.
Confirm the needle is correctly inserted and appropriate for your fabric type. A bent or dull needle can disrupt the threading process and damage the fabric. Finally, verify the bobbin is properly wound and inserted according to your machine’s manual. A correctly prepared machine sets the stage for successful and enjoyable sewing, minimizing potential threading headaches and maximizing stitch quality.
Threading the Upper Thread
Begin by placing the thread spool on the spool pin, securing it with a spool cap to prevent unraveling. Guide the thread through the first thread guide, typically located near the spool pin, then down to the tension discs – ensuring the thread seats between them for proper tension control. Next, follow the threading path indicated by arrows or numbers on your machine, passing through additional guides.
Carefully thread the take-up lever, and finally, thread the needle from front to back. A needle threader can be incredibly helpful! Always double-check that the thread is correctly seated in each guide, ensuring a smooth, uninterrupted path. Proper upper threading is vital for consistent stitch formation and preventing thread breakage during sewing;
Winding and Inserting the Bobbin
Start by placing the thread spool on the spool pin for winding. Guide the thread through the designated thread guides for bobbin winding, and then around the bobbin several times, securing the end. Engage the bobbin winding mechanism, typically by pushing the bobbin spindle to the right. Allow the machine to wind the bobbin evenly, stopping automatically when full.
Once wound, carefully insert the bobbin into the bobbin case, ensuring it rotates freely and the thread unwinds in the correct direction. Guide the thread through the tension spring of the bobbin case, and then up through the designated slot or guide to meet the upper thread. Correct bobbin insertion is crucial for balanced stitch formation.
Maintaining Your Thread Guides
Regular maintenance of thread guides—cleaning lint and debris—ensures smooth thread flow, preventing tension issues and skipped stitches for optimal sewing performance.
Cleaning Thread Guides
Consistent cleaning of your sewing machine’s thread guides is paramount for maintaining optimal performance. Over time, lint, dust, and stray thread fibers accumulate within these guides, hindering smooth thread passage. This buildup can lead to frustrating issues like thread breakage, skipped stitches, and uneven tension.
To effectively clean the guides, begin by powering off and unplugging your machine. Utilize a small, soft brush – a toothbrush works wonderfully – to gently dislodge loose debris. For stubborn buildup, a slightly dampened cotton swab can be carefully used, ensuring no moisture enters the machine’s internal mechanisms. Compressed air can also be employed to blast away particles. Regularly cleaning your thread guides, ideally after each project or every few hours of use, will significantly extend the life of your machine and ensure consistently beautiful results.
Lubricating Thread Guides
While not always necessary, occasional lubrication of your sewing machine’s thread guides can further enhance thread flow and minimize friction. However, it’s crucial to use the correct type of lubricant – specifically, a sewing machine oil designed for this purpose. Avoid using general-purpose oils, as they can attract dust and gum up the mechanism.
Apply a very small drop of oil to a cotton swab and gently dab it onto the thread guides. Avoid over-lubrication, as excess oil can migrate and cause problems elsewhere. Wipe away any excess oil immediately. Lubrication is particularly beneficial for machines used frequently or those experiencing persistent thread issues. Remember to consult your sewing machine’s manual for specific lubrication recommendations, as some models may have designated lubrication points.
Inspecting for Damage
Regularly inspecting your sewing machine’s thread guides for any signs of wear and tear is vital for maintaining optimal performance. Look closely for cracks, chips, or rough edges on the guides themselves. Even small imperfections can cause thread to fray or snag, leading to skipped stitches and frustration. Pay particular attention to ceramic guides, as they can be brittle and prone to cracking.
Also, check for any buildup of lint or thread fragments within the guides. A magnifying glass can be helpful for a thorough inspection. If you discover damaged guides, they should be replaced promptly to prevent further issues. Replacement guides are typically available from sewing machine retailers or directly from the manufacturer.
Troubleshooting Threading Issues
Addressing threading problems often involves checking tension, needle type, and bobbin insertion, but always confirm the thread is correctly seated in all guides.
Incorrect Thread Tension
Improper thread tension is a frequent culprit behind threading issues, often manifesting as loops on either side of the fabric or thread breakage. The thread guides play a vital role in maintaining consistent tension as the thread travels from the spool to the needle.
If the upper thread tension is too loose, the bobbin thread will pull through to the top, creating messy stitches. Conversely, overly tight upper tension can cause the upper thread to break or create puckering. Ensure the thread flows freely through each guide without obstruction. A properly adjusted tension relies on the thread moving smoothly through all guides, not just the tension dial itself. Experiment with small adjustments to the tension dial, re-threading through the guides after each change, to find the optimal setting for your fabric and thread combination.
Wrong Needle Type
Selecting the correct needle is paramount for successful sewing, and it directly impacts how the thread interacts with the thread guides. A mismatched needle can cause thread to fray, skip stitches, or even damage the guides themselves. Different fabrics require different needle types – universal, ballpoint, stretch, or even leather needles.
Using a needle too large or too small for the thread weight can disrupt the thread’s path through the guides, leading to tension problems. Ensure the needle eye is appropriately sized for your chosen thread. A dull or damaged needle will also cause issues, increasing friction and potentially misdirecting the thread as it passes through the guides. Regularly inspect and replace your needle to maintain smooth thread flow and prevent damage.
Improper Bobbin Insertion
Correct bobbin insertion is critical for consistent stitch formation and proper thread guidance. If the bobbin isn’t seated correctly, the thread won’t pull smoothly, causing tension imbalances and potentially disrupting the upper thread’s path through the guides. Ensure the bobbin is wound evenly and inserted in the correct direction, as specified in your sewing machine manual.
A loosely inserted bobbin can lead to skipped stitches or thread bunching, while a tightly jammed bobbin can prevent the thread from unwinding properly. Always test the tension after inserting a new bobbin, and verify that the thread flows freely through the bobbin case and up to the needle, interacting correctly with the upper thread guides.
Advanced Threading Techniques
Mastering advanced techniques unlocks creative potential, allowing for specialized projects with varied fabrics and multiple threads, optimizing thread guide usage.
Threading for Different Fabrics
Selecting the correct thread and adjusting thread guides are paramount when working with diverse fabrics. Lightweight fabrics, like silk or chiffon, require finer threads and potentially adjusted tension settings, ensuring the thread guides deliver a delicate, even flow. Heavier materials, such as denim or canvas, demand stronger threads and may benefit from utilizing all available thread guides to maintain control and prevent breakage.
Consider the fabric’s weave; tighter weaves often necessitate smoother threads and precise guide alignment. Experimenting with thread paths and guide positions can significantly impact stitch quality. Always test on a scrap piece of the fabric before beginning your project to confirm optimal threading for a professional finish. Proper thread guidance minimizes puckering and ensures consistent results across various textile types.
Using Multiple Threads
Employing multiple threads simultaneously opens creative avenues in sewing, but demands meticulous attention to thread guide management. When utilizing dual or decorative threading, ensure each thread path is clear, separate, and correctly guided to prevent tangling and uneven tension. Utilizing additional thread guides is crucial for maintaining individual thread control.
Different machines offer varying configurations for multiple threads; consult your manual for specific guidance. Proper spacing between guides is vital, preventing friction and breakage; Experiment with thread weights and colors for unique effects, but always prioritize smooth, consistent delivery to the needle. Careful threading and tension adjustments are key to achieving professional-looking results with complex thread arrangements.
Decorative Threading
Decorative threading techniques, like ricrac, couching, or using multiple colors for textured effects, heavily rely on precise thread guidance. Specialized thread guides, or creatively repurposed ones, become essential for controlling each thread’s path and tension independently. These techniques often involve layering threads, requiring ample space and smooth transitions between guides;
Experimenting with different guide placements can dramatically alter the final appearance. Ensure each thread remains untangled and flows freely to the needle. Consider using contrasting thread weights for added dimension. Mastering decorative threading elevates projects, transforming simple seams into artistic expressions, all thanks to well-managed thread paths and reliable guides.
Resources for Further Learning
Expand your knowledge with online tutorials, comprehensive sewing machine manuals, and hands-on local sewing classes for mastering thread guidance techniques.
Online Tutorials
Numerous online platforms offer a wealth of visual guides and step-by-step instructions for understanding and troubleshooting thread guide systems. YouTube channels dedicated to sewing often feature detailed videos demonstrating proper threading techniques for various machine models. These tutorials can be incredibly helpful for visual learners, allowing you to observe the correct path of the thread and identify potential issues.
Websites specializing in sewing machine repair and maintenance frequently provide articles and diagrams illustrating common thread guide problems and their solutions. Searching for specific machine brands and models alongside “threading tutorial” will yield targeted results. Don’t hesitate to explore forums and online communities where experienced sewists share their knowledge and offer advice on navigating complex threading challenges.
Sewing Machine Manuals
Your sewing machine’s manual is the most reliable source of information regarding its specific threading requirements. These manuals typically include detailed diagrams illustrating the correct path for both upper and bobbin threads, highlighting the function of each thread guide. They often address common threading errors and provide troubleshooting tips tailored to your machine model.
Pay close attention to the manual’s instructions on thread tension adjustments, as proper tension is crucial for smooth thread flow through the guides. Many manuals also offer guidance on selecting the appropriate thread type and needle size for different fabrics, impacting threading performance. If you’ve misplaced your manual, most manufacturers offer downloadable versions on their websites.
Local Sewing Classes
Enrolling in a local sewing class provides hands-on experience and personalized guidance regarding thread guides. An instructor can demonstrate proper threading techniques specific to various machine types, addressing individual challenges you might encounter. These classes often cover common threading mistakes and how to avoid them, ensuring a smoother sewing process.
Furthermore, classes offer a collaborative learning environment where you can share experiences and learn from fellow sewists. Instructors can also explain the importance of thread tension and how it interacts with the thread guides for optimal stitch formation. Local sewing shops frequently host these classes, providing access to expert advice and a supportive community.
