Brother Sewing Machine Manual: A Comprehensive Guide
This manual details setup‚ operation‚ troubleshooting‚ and wireless connectivity for Brother sewing machines‚ including driver installation and utilizing iPrint&Scan software.
Brother sewing machines are renowned for their innovation‚ reliability‚ and user-friendly design‚ catering to both beginners and seasoned sewing enthusiasts. This manual serves as a comprehensive resource‚ guiding you through every aspect of your machine’s functionality. From initial setup and basic operations to advanced techniques and troubleshooting‚ we’ll cover it all.
Modern Brother machines often feature wireless connectivity‚ allowing seamless integration with mobile devices via applications like Brother iPrint&Scan. Understanding these features enhances your creative possibilities. Genuine Brother accessories and adherence to safety guidelines are crucial for optimal performance and longevity. This guide ensures you maximize your sewing experience with your Brother machine.
Understanding Your Machine Model
Each Brother sewing machine model possesses unique features and capabilities. Before beginning‚ identify your specific model number – crucial for downloading the correct drivers and accessing tailored support resources on the Brother website. The VX SERIES service manual‚ for example‚ provides detailed insights into specific functionalities.
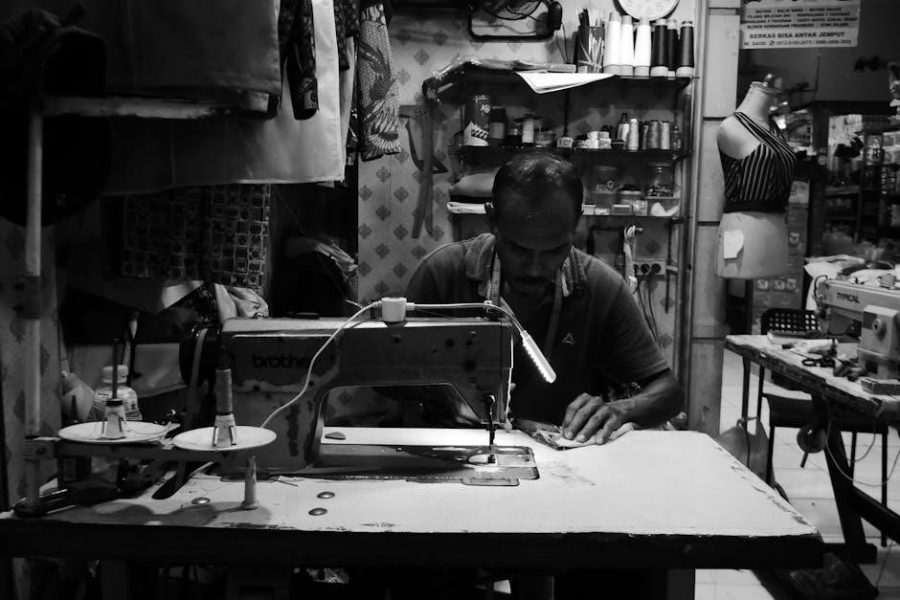
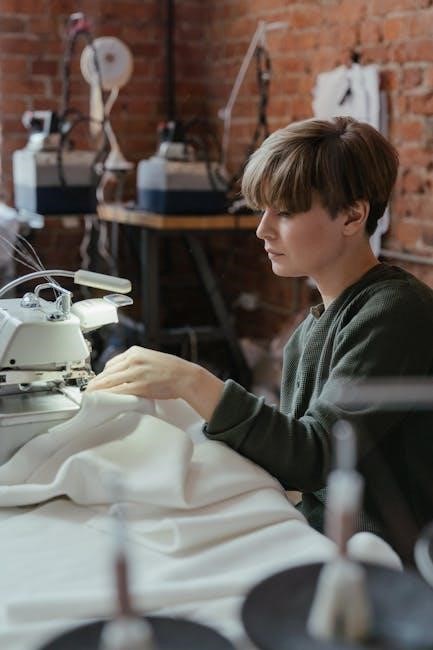
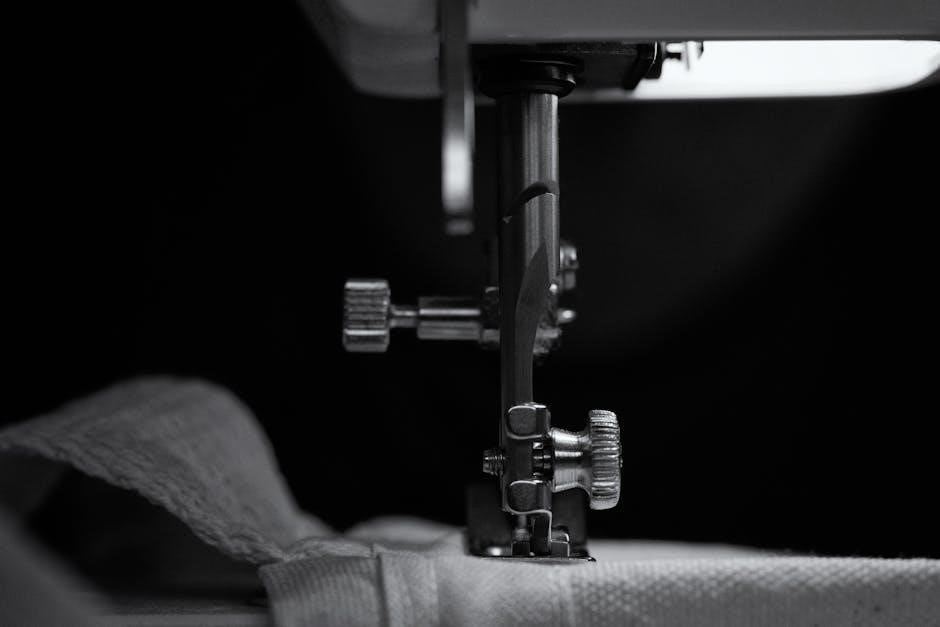
Familiarize yourself with the machine’s components‚ including the presser feet‚ bobbin winder‚ and stitch selection dial. Refer to the diagrams within this manual for clear identification. Understanding these elements is fundamental to successful sewing. Always use recommended accessories to avoid damage and ensure optimal performance‚ as highlighted in the official documentation.
Setting Up Your Brother Sewing Machine
Proper setup involves unboxing‚ connecting the power‚ winding the bobbin‚ and carefully threading both upper and lower threads for optimal function.
Unboxing and Initial Inspection
Carefully remove your new Brother sewing machine from its packaging‚ retaining the box and packing materials for potential future transport or warranty claims. Inspect the machine thoroughly for any visible signs of damage that may have occurred during shipping. This includes checking the body‚ presser foot‚ accessories‚ and power cord.
Verify that all included accessories are present‚ referencing the accessory list in this manual. Common accessories include various presser feet‚ bobbins‚ needles‚ a screwdriver‚ and a seam ripper. If any items are missing or damaged‚ immediately contact your Brother dealer or customer support. Ensure the machine is clean and free of any packing debris before proceeding with setup. A visual inspection now can prevent issues later.
Attaching the Power Cord and Foot Pedal
Before connecting the power‚ ensure the machine’s power switch is in the “OFF” position. Locate the power jack on the back of the sewing machine and firmly insert the power cord. Next‚ connect the foot pedal cable into the designated port‚ usually located near the power jack.
Ensure both connections are secure to prevent interruptions during sewing. Do not use excessive force. The foot pedal controls the sewing speed; a properly connected pedal is crucial for operation. Plug the power cord into a grounded electrical outlet that matches the voltage requirements specified on the machine’s label. Avoid using extension cords if possible.
Winding the Bobbin
Begin by placing the thread spool on the spool pin. Guide the thread through the thread guide‚ then onto the bobbin winding tension disc. Next‚ insert the empty bobbin onto the bobbin winder spindle‚ ensuring it clicks into place. Push the bobbin winder spindle to the right to engage it.
Hold the thread tail and start the machine by gently pressing the foot pedal. Wind several turns manually‚ then release the pedal to allow the machine to wind the bobbin automatically. Once full‚ the machine will stop. Cut the thread and remove the full bobbin.
Threading the Upper Thread
Raise the presser foot and the needle to its highest position. Begin by guiding the thread from the spool‚ through the thread guide‚ and then down into the tension discs – ensure it’s firmly seated. Next‚ lead the thread through the take-up lever‚ and then down through the thread guide above the needle.
Finally‚ thread the needle from front to back. Pull a sufficient length of thread through the needle eye. Gently pull the thread tail under the presser foot. Your machine is now correctly threaded for upper stitching.
Threading the Lower Thread (Bobbin)
After winding the bobbin‚ locate the bobbin case beneath the needle plate. Open the bobbin cover and insert the bobbin‚ ensuring it unwinds in the correct direction – typically counter-clockwise. Guide the thread through the tension spring on the bobbin case‚ then through the narrow slit.
Carefully reinsert the bobbin case into the machine. Gently pull a few inches of thread through the slit‚ and then under the presser foot. Proper bobbin threading is crucial for balanced stitches and preventing issues like thread bunching.
Basic Sewing Operations
Master fundamental techniques like stitch selection‚ length/width adjustments‚ straight and zigzag sewing‚ and essential backstitching for successful projects.
Selecting Stitch Patterns
Brother sewing machines offer a diverse range of stitch patterns beyond the standard straight and zigzag. To select a stitch‚ locate the stitch selection dial or digital interface on your machine. Consult your model’s manual for specific instructions‚ as the location and operation vary.
Typically‚ you’ll find numbered or labeled options representing different stitches – utility stitches for garment construction‚ decorative stitches for embellishment‚ and specialized stitches like buttonhole or blind hem stitches. Rotate the dial or navigate the digital menu to the desired stitch number or symbol.
Always test the selected stitch on a scrap fabric before beginning your project to ensure it produces the desired effect. Experiment with different stitch patterns to enhance your sewing creativity and achieve professional-looking results.
Adjusting Stitch Length and Width
Precise control over stitch length and width is crucial for achieving optimal sewing results. Brother machines feature dedicated dials or digital controls for these adjustments. Stitch length determines the distance between stitches‚ impacting fabric strength and appearance; shorter lengths for delicate fabrics‚ longer for heavier materials.
Stitch width controls the breadth of zigzag or decorative stitches‚ influencing coverage and design impact. Locate the length and width adjustment dials‚ typically near the stitch selection area. Experiment with settings on scrap fabric to understand their effects.
Refer to your machine’s manual for recommended settings based on fabric type and stitch pattern. Accurate adjustments ensure secure seams and visually appealing finishes.
Sewing Straight Stitches
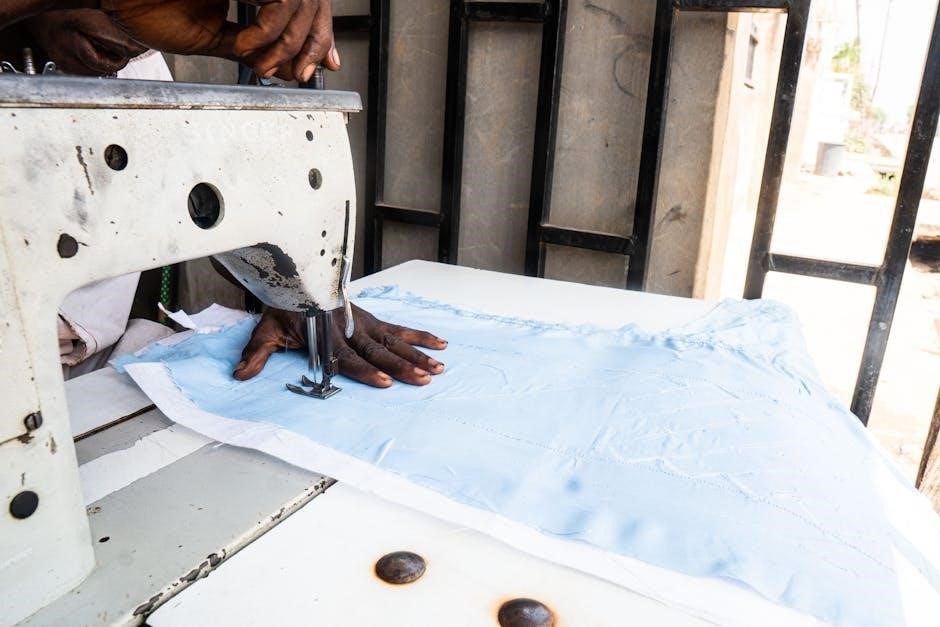
Mastering the straight stitch is fundamental to sewing. Begin by selecting the straight stitch option on your Brother machine – usually indicated by a straight line symbol. Ensure your fabric is positioned correctly under the presser foot‚ aligning the desired seam allowance with the guide markings on the needle plate.
Gently depress the foot pedal to initiate sewing‚ guiding the fabric smoothly and consistently. Avoid pulling or pushing the fabric; let the machine feed it through. Maintain a consistent speed for even stitches.
Practice on scrap fabric to develop a feel for controlling the machine and achieving a straight‚ uniform seam. Backstitch at the beginning and end to secure the stitches.
Sewing Zigzag Stitches
The zigzag stitch offers versatility for various applications‚ from finishing raw edges to creating decorative effects. Select the zigzag stitch pattern on your Brother machine‚ typically represented by a zigzag symbol. Adjust the stitch width using the designated control; wider settings create broader zigzags.
Practice on scrap fabric to understand how different width settings impact the stitch appearance. Zigzag stitches are excellent for preventing fabric fraying‚ especially on knit fabrics. They also provide stretch‚ accommodating fabrics that require flexibility.
Use a consistent speed and guide the fabric gently‚ allowing the machine to feed it evenly. Experiment with stitch length for varied results.
Backstitching
Backstitching secures the beginning and end of a seam‚ preventing unraveling. After starting your seam‚ sew a few stitches forward‚ then engage the backstitch lever or button (often marked with a curved arrow). This reverses the stitching over the initial stitches‚ locking them in place.
Continue sewing forward‚ then repeat the backstitching process at the end of the seam. The length of the backstitch is usually short‚ around 1/2 inch‚ but can vary depending on the fabric and desired security.
Consistent backstitching ensures a durable and professional finish. Always test on scrap fabric first!
Advanced Sewing Techniques
Explore specialized skills like using varied presser feet‚ creating buttonholes and zippers‚ plus decorative stitching and applique for enhanced projects.
Using Different Presser Feet
Brother sewing machines offer a variety of presser feet to tackle diverse projects. The standard zig-zag foot is versatile for everyday sewing‚ while a buttonhole foot simplifies creating perfectly sized buttonholes. A zipper foot allows precise stitching close to zipper teeth‚ ensuring professional results.
For quilting‚ consider a walking foot‚ which evenly feeds fabric layers‚ preventing puckering. A blind hem foot creates invisible hems‚ ideal for delicate fabrics. Decorative feet enable specialized stitching‚ adding unique embellishments. Always consult your machine’s manual to identify the correct foot for your desired technique and ensure proper attachment for optimal performance. Experimenting with different feet unlocks a wider range of creative possibilities.
Sewing Buttonholes
Brother sewing machines often feature a one-step buttonhole function for effortless creation. First‚ attach the buttonhole foot – it’s specifically designed for neat‚ consistent results. Select the buttonhole stitch on your machine; many models offer pre-programmed sizes.
Measure your button and choose the corresponding buttonhole size setting. Place the button under the presser foot guide‚ aligning it with the markings. Lower the presser foot and begin sewing; the machine automatically stitches the buttonhole outline. Refer to your manual for specific instructions‚ as procedures vary by model. Practice on scrap fabric before sewing on your final garment to ensure perfect buttonholes every time.
Sewing Zippers
Brother machines offer several zipper feet to simplify installation. A standard zipper foot allows sewing close to the zipper teeth. Begin by pinning the zipper tape to your fabric‚ right sides together. Select a straight stitch and adjust the stitch length appropriately for your fabric.
Position the zipper foot so the needle sews as close to the zipper coils as possible. Slowly stitch along the zipper tape‚ guiding the fabric evenly. Consult your manual for specific foot recommendations and techniques. For invisible zippers‚ utilize the invisible zipper foot‚ which creates a nearly hidden seam. Practice on scrap fabric to master the technique before working on your project.
Applique and Decorative Stitching
Brother sewing machines excel in applique and decorative stitching‚ offering a wide range of pre-programmed designs. Utilize the appropriate stabilizer for your fabric to prevent puckering. Select a decorative stitch from your machine’s menu and test it on scrap fabric to ensure desired effect.
For applique‚ position your fabric pieces and stitch around the edges using a satin stitch or decorative stitch. Refer to your manual for stitch settings and foot recommendations. Experiment with different stitch patterns and thread colors to create unique designs. Many Brother machines also support importing designs via USB for customized applique work. Remember to adjust stitch length and width for optimal results.
Troubleshooting Common Issues
This section addresses frequent problems like needle breakage‚ thread bunching‚ and skipped stitches‚ offering solutions to maintain your Brother sewing machine’s performance.
Needle Breaking
Frequent needle breakage can stem from several causes‚ requiring careful diagnosis. Ensure you’re using the correct needle type and size for your fabric weight; a too-thin needle struggles with heavier materials. Improper threading‚ particularly incorrect upper thread guidance‚ creates excessive tension‚ leading to breakage. Always re-thread the machine correctly.
A bent or damaged needle is a prime suspect; replace it immediately. Check the needle plate to confirm it isn’t obstructing the needle’s movement. Excessive sewing speed‚ especially with thick fabrics‚ can also cause needles to snap. Reduce speed when tackling challenging materials. Finally‚ ensure the foot pressure is appropriately adjusted – too much pressure strains the needle. Regularly inspect and replace your needle for optimal sewing.
Thread Bunching
Thread bunching‚ often appearing on the underside of the fabric‚ indicates a tension imbalance. The most common culprit is improperly threaded machine – meticulously re-thread both the upper and lower threads‚ ensuring they follow the correct paths. Check the bobbin winding; an unevenly wound bobbin causes inconsistent tension. Confirm the bobbin is inserted correctly.
Incorrect tension settings are also frequent causes; adjust the upper tension dial incrementally. Lint and debris accumulating in the bobbin case disrupt smooth thread flow‚ so clean it thoroughly. Using mismatched thread weights – a heavy top thread with a light bobbin thread – creates tension issues. Always use compatible thread weights. Finally‚ a dull needle can contribute to thread bunching; replace it.
Skipped Stitches
Skipped stitches often signal a problem with the needle‚ thread‚ or fabric feed. First‚ ensure the needle is correctly inserted – it must be fully pushed up into the needle clamp. A bent or damaged needle is a common cause; replace it immediately. Verify you’re using the correct needle type and size for your fabric.
Incorrect threading is another frequent issue; re-thread the upper thread‚ paying close attention to the thread guides. Check the thread for knots or damage. Insufficient presser foot pressure can also cause skipped stitches; adjust the pressure if necessary. Ensure the fabric is feeding smoothly – avoid stretching or pulling it. Finally‚ lint buildup around the needle plate can interfere with stitch formation; clean the area thoroughly.

Wireless Connectivity & Software
Connect your Brother machine to infrastructure or adhoc wireless networks‚ then install the full driver and software package‚ utilizing Brother iPrint&Scan.
Joining to an Infrastructure Wireless Network
To connect to an infrastructure wireless network‚ access the machine’s settings menu and navigate to the wireless setup wizard. Select your network name (SSID) from the available list. If your network is hidden‚ you’ll need to manually enter the SSID.
Enter the network security key (password) when prompted‚ ensuring correct capitalization. The machine will then attempt to connect‚ displaying a success or failure message. Refer to the machine’s display for detailed‚ step-by-step instructions.
Once connected‚ you can utilize features like Brother iPrint&Scan for mobile printing and scanning. Ensure your computer and the sewing machine are on the same network for seamless operation. Troubleshooting steps are available in the full manual if connection fails.
Joining to an Adhoc Wireless Network
Connecting to an Adhoc network requires creating a direct wireless connection between your computer and the Brother machine. This method is useful when an infrastructure network isn’t available. First‚ establish an adhoc network on your computer‚ noting the network name (SSID) and security key.
On the Brother machine‚ access the wireless setup wizard and select the option to connect to an adhoc network. Manually enter the SSID and security key of your computer’s adhoc network.
The machine will attempt to connect‚ and successful connection enables features like direct printing. Refer to the machine’s display for specific guidance. Ensure your computer remains within range for a stable connection.
Installing Full Driver and Software Package
To install the full driver and software package‚ begin by downloading it from the official Brother support website. Navigate to your machine’s product category and model‚ then select your operating system. The installation will automatically commence after the download completes.
Follow the on-screen prompts‚ accepting license agreements and choosing installation preferences. The package includes essential drivers for printing and scanning‚ alongside utilities like Brother iPrint&Scan.
Ensure your machine is connected to your computer during installation. The process may require a restart. Successful installation unlocks the full functionality of your Brother device.
Using Brother iPrint&Scan
Brother iPrint&Scan provides convenient access to scanning and workflow features on your PC or Mac. Download and install the application from the Brother support website‚ selecting the version compatible with your operating system.
Once installed‚ iPrint&Scan allows you to scan documents and images directly to your computer‚ utilizing various resolution and format options. It also supports cloud connectivity‚ enabling you to save files to services like Dropbox and Google Drive.
Explore the software’s interface to discover advanced features like OCR (Optical Character Recognition) and document management tools‚ enhancing your productivity.
Maintenance and Care
Regular cleaning‚ lubrication‚ and needle replacement are crucial for optimal performance and longevity of your Brother sewing machine‚ ensuring smooth operation.
Cleaning Your Sewing Machine
Consistent cleaning prevents lint and debris buildup‚ which can cause malfunctions and affect stitch quality. Always disconnect the power cord before cleaning. Use a soft brush – often included with your machine – to remove lint from the bobbin area‚ feed dogs‚ and around the needle plate. A small vacuum cleaner with a brush attachment is also effective for removing stubborn lint.
Wipe down the exterior surfaces with a slightly damp cloth. Avoid using harsh chemicals or abrasive cleaners‚ as these can damage the machine’s finish. For hard-to-reach areas‚ a cotton swab dipped in rubbing alcohol can be helpful. Regularly clean the bobbin case and ensure it moves freely. Proper cleaning extends the life of your Brother sewing machine and maintains its performance.
Lubrication
Proper lubrication is crucial for smooth operation and longevity of your Brother sewing machine‚ but it’s essential to follow guidelines carefully. Generally‚ Brother machines are designed to be self-lubricating and do not require frequent oiling. Over-oiling can attract lint and cause more problems than it solves;
If your machine’s manual specifically instructs oiling‚ use only sewing machine oil – never household oil or grease. Apply a small drop to the designated oiling points‚ typically around the bobbin race and hook area. Wipe away any excess oil immediately to prevent staining fabric. Avoid lubricating the tension discs or feed dogs. Consult your model’s manual for specific lubrication instructions.
Replacing the Needle
Regular needle replacement is vital for optimal sewing performance and preventing damage to your Brother machine. A bent or dull needle can cause skipped stitches‚ thread breakage‚ and fabric puckering. Always use the correct needle type and size for your fabric.
To replace the needle‚ ensure the machine is turned off. Loosen the needle clamp screw and remove the old needle. Insert the new needle with the flat side facing the back of the machine. Tighten the screw securely‚ but avoid over-tightening. Dispose of used needles safely to prevent injury. Refer to your machine’s manual for specific needle replacement instructions.
Safety Precautions
Always use the sewing machine as described in the manual‚ employing only recommended accessories. Prioritize electrical safety and intended use.
General Safety Guidelines
Before operating your Brother sewing machine‚ carefully read the entire manual to understand its functions and safety features. Always disconnect the power cord when making adjustments‚ changing the needle‚ or performing maintenance. Keep fingers away from moving parts‚ like the needle and presser foot‚ during operation to prevent injury.
Never pull the fabric while sewing; let the machine feed it evenly. Avoid sewing over pins‚ as they can damage the needle and machine. Ensure the machine is placed on a stable‚ level surface during use. Supervise children closely when they are near the sewing machine‚ and never allow them to operate it unsupervised. Use only genuine Brother accessories to maintain safety and performance.
Electrical Safety
To ensure electrical safety‚ always use a properly grounded outlet with the correct voltage as specified on the machine’s nameplate. Never operate the sewing machine with a damaged power cord or plug; replace them immediately. Avoid using extension cords if possible‚ and if necessary‚ use a heavy-duty extension cord rated for the machine’s power consumption.
Do not expose the machine to water or moisture‚ as this could create an electrical hazard. When unplugging the machine‚ grasp the plug itself‚ not the cord. Never attempt to repair the machine’s electrical components yourself; contact a qualified technician for repairs. Keep the area around the machine free from flammable materials.