The FTDX10 is a sophisticated HF/50MHz all-mode transceiver, offering intuitive operation and advanced features. This manual guides users through setup, operation, and maintenance.
Overview of the FTDX10
The Yaesu FTDX10 represents a significant advancement in amateur radio technology, designed for both seasoned operators and those new to the hobby. It’s a versatile transceiver covering HF and 50MHz bands, boasting a user-friendly interface alongside powerful digital signal processing capabilities.
This radio excels in crowded band conditions, offering exceptional selectivity and noise reduction. The FTDX10’s intuitive layout and comprehensive manual ensure a smooth learning curve. It seamlessly integrates with computer-based digital modes, expanding operational possibilities. Its robust construction and reliable performance make it a valuable asset for any ham shack.
Key Features and Benefits
The FTDX10 delivers exceptional performance with its direct-sampling system, providing high dynamic range and minimal distortion. Key benefits include superior noise reduction, advanced IF filtering, and a spectrum scope for detailed signal analysis.
Its user-friendly interface, coupled with comprehensive memory and scanning functions, simplifies operation. Seamless digital mode integration expands versatility. The FTDX10 offers 15GB of storage, enhanced security, and mobile access. Enjoy efficient email management with Gemini AI features, available across all devices.
Getting Started with the FTDX10
Initial setup involves unboxing, connecting power and an antenna, and a simple power-on sequence. Refer to the manual for detailed instructions and safety precautions.
Unboxing and Initial Setup
Carefully unpack the FTDX10 transceiver and all included accessories. Verify all components are present, referencing the packing list in your manual. Inspect for any shipping damage immediately. Before connecting power, familiarize yourself with the rear panel connections.
Initial setup requires careful attention to detail. Ensure the transceiver is placed in a well-ventilated area. The manual provides diagrams illustrating proper cable connections. Double-check all connections before applying power to prevent potential damage. A thorough read-through of the initial setup section is highly recommended.
Connecting to Power and Antenna
Prior to connecting power, ensure the correct voltage is selected on the rear panel. Incorrect voltage can cause severe damage to the transceiver. Use a properly grounded AC power cord. Antenna connection is crucial for optimal performance; utilize a 50-ohm antenna system.
The manual details proper antenna impedance matching. Always use a coaxial cable with appropriate shielding and connectors. Before transmitting, verify the SWR (Standing Wave Ratio) to protect the transceiver’s final amplifier. A low SWR indicates efficient power transfer to the antenna.
Basic Operation – Power On/Off
To power on the FTDX10, press and hold the front panel’s power button until the display illuminates. The transceiver will perform a self-test sequence. Ensure all connections (power, antenna) are secure before powering on. To power off, repeat the process – press and hold the power button until the display shuts down completely.
The manual emphasizes avoiding frequent short power cycles. Allow the transceiver to fully power down before restarting. This ensures proper internal component stabilization and prolongs the unit’s lifespan. Always disconnect the power cord during extended periods of inactivity.

Understanding the FTDX10 Front Panel
The front panel features a clear display, main tuning knob, mode selection buttons, and various controls. Familiarizing yourself with these elements is crucial for operation.
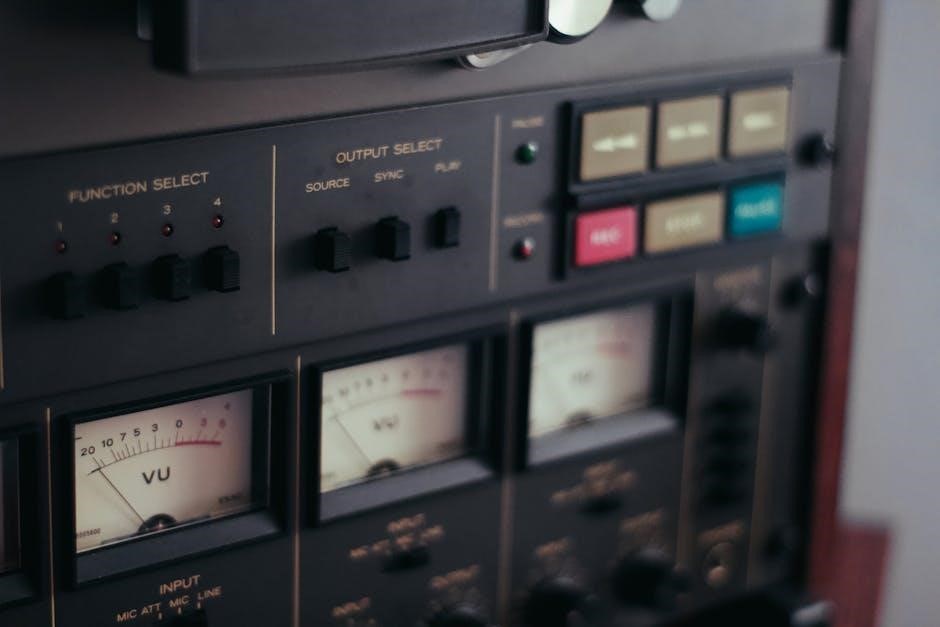
Display and Meter Section
The FTDX10’s display provides comprehensive information, including frequency, mode, signal strength, and power output. It utilizes a high-contrast LCD for excellent readability, even in bright conditions. The meter section offers visual indication of signal levels, power output, and SWR (Standing Wave Ratio).
Users can customize the display’s brightness and contrast. The meter can be switched between various functions, allowing for monitoring of different parameters during operation. Understanding these visual cues is essential for optimizing performance and ensuring efficient communication. The display also shows memory channel information and scanning status.
Main Tuning Knob and Frequency Selection
The FTDX10 features a precision main tuning knob for smooth and accurate frequency selection. This knob allows for both coarse and fine tuning adjustments, enabling precise targeting of desired signals. Direct frequency entry is also supported via the keypad, offering a quick alternative for entering specific frequencies.
Users can utilize the scan function to automatically search for active signals. Memory channel selection is easily achieved through the keypad or dedicated memory buttons. The tuning knob’s responsiveness and accuracy contribute significantly to the overall operating experience.
Mode Selection and Operation Buttons
The FTDX10’s front panel incorporates dedicated buttons for swift mode selection – SSB, FM, CW, and digital modes. These buttons provide instant access to preferred operating modes, streamlining the user experience. Operation buttons control key functions like transmit, receive, and squelch.
Additional buttons manage features such as VOX, noise reduction, and filter settings. Clearly labeled and logically arranged, these controls ensure intuitive operation even during fast-paced communication. The responsive buttons enhance the transceiver’s usability.

Detailed Operational Modes
The FTDX10 supports SSB, FM, and CW modes, alongside digital capabilities. Each mode offers unique features and settings for optimal performance and communication.
SSB (Single Sideband) Operation
Single Sideband (SSB) is a primary mode for long-distance HF communication. The FTDX10 provides excellent SSB performance with features like adjustable carrier suppression and selectable sideband options (USB/LSB). Fine-tune the microphone gain and speech compression for clear audio transmission. Utilize the built-in VOX for hands-free operation.
For receiving, adjust the RF gain and IF bandwidth to optimize signal clarity and minimize noise. The FTDX10’s sharp filters effectively reject adjacent signals. Experiment with the noise reduction features to enhance weak signal reception during challenging conditions.
FM (Frequency Modulation) Operation
The FTDX10 excels in FM operation, ideal for local communication and repeater access. Select the FM mode and set the desired frequency. Ensure proper squelch adjustment to eliminate unwanted noise while receiving signals. The FTDX10 supports both narrowband and wideband FM, catering to various repeater systems.
For transmitting, monitor your output power to avoid over-deviation. Utilize the built-in tone encoder/decoder for accessing CTCSS/DCS-protected repeaters. Fine-tune the microphone gain for optimal audio quality and clarity during FM transmissions.
CW (Continuous Wave) Operation
The Yaesu FTDX10 provides robust CW capabilities for dedicated Morse code communication. Access CW mode via the front panel, and adjust the sending speed to your preference using the key speed control. Connect a paddle or straight key to the rear panel connector for transmitting Morse code signals.
The FTDX10 features a built-in electronic keyer with adjustable weighting and sidetone. Utilize the CW filter for enhanced readability in noisy conditions. Practice and refine your Morse code skills with this versatile transceiver.

Advanced Features and Settings
Explore the FTDX10’s extensive customization options, including VOX, noise reduction, and IF filtering, to optimize performance and tailor the transceiver to your needs.
VOX (Voice Operated Exchange) Configuration
Voice Operated Exchange (VOX) allows hands-free operation of the FTDX10. Access the VOX settings through the menu system, adjusting the delay, sensitivity, and anti-VOX levels. Proper configuration prevents accidental transmissions triggered by background noise or strong signals. Experiment with settings to find the optimal balance for your operating environment and voice characteristics.
The manual details how to select the appropriate microphone input and adjust the VOX level for clear and reliable hands-free communication. Careful adjustment is crucial for effective VOX operation.
Noise Reduction and Filtering Options
The Yaesu FTDX10 boasts robust noise reduction and filtering capabilities to enhance receive clarity. Explore the built-in noise reduction (NR) feature, adjustable through the menu, to minimize background static and interference; Utilize the IF filters – selectable bandwidths – to tailor reception to signal conditions. Narrow filters reject unwanted signals, while wider filters capture broader bandwidth audio.
The manual explains how to optimize these settings for various operating scenarios, improving signal-to-noise ratio and overall listening experience.
IF Filtering and Bandwidth Control
The FTDX10 provides extensive control over Intermediate Frequency (IF) filtering and bandwidth, crucial for optimizing receive performance. Selectable IF filters – 300Hz, 500Hz, 2.4kHz, 6kHz – allow tailoring the receiver to specific signal conditions and desired audio quality. Wider bandwidths suit SSB voice, while narrower filters excel in weak-signal or crowded band environments.
The manual details how to adjust bandwidth for optimal clarity and interference rejection, enhancing the listening experience.
Memory and Scanning Functions
The FTDX10’s memory system stores frequently used frequencies, while scanning modes quickly search for active signals across bands. This manual explains programming and usage.
Memory Channel Programming
Storing frequently used frequencies into the FTDX10’s memory channels simplifies operation and allows for quick recall. The manual details how to directly input frequencies, or utilize memory transfer functions from scanned signals. Each memory channel can also store a descriptive name, aiding in identification.
Programming involves selecting an empty memory channel, entering the desired frequency, and optionally assigning a name. The FTDX10 supports multiple memory banks for organized storage. Review the manual for detailed step-by-step instructions and advanced programming options, including memory backup procedures.
Scanning Modes and Settings
The FTDX10 offers versatile scanning capabilities, allowing you to monitor a range of frequencies for activity. The manual explains various scan modes, including frequency, memory, and program scan. Customize scan speed, scan direction, and scan resumption settings to suit your preferences.
Configure scan lists to focus on specific bands or memory groups. Explore features like carrier squelch and tone squelch to filter unwanted signals during scanning. Detailed instructions within the manual will guide you through optimizing scan performance for effective monitoring.
Memory Group Management
The FTDX10’s memory group feature allows for organized storage of frequently used frequencies. The manual details how to create, name, and assign channels to custom groups. This facilitates quick access to specific bands, modes, or regions.
You can easily recall entire groups during scanning or manual operation. Learn to copy and move memories between groups, ensuring efficient organization. The manual provides step-by-step instructions for maximizing the benefits of this powerful memory management system.
Digital Mode Operation
The FTDX10 supports popular digital modes like PSK31 and RTTY. This section of the manual explains interface setup and software configuration for seamless digital communication.
Setting up for Digital Modes (PSK31, RTTY)
Preparing the FTDX10 for digital operation requires careful attention to interface settings. First, connect your computer using the appropriate USB or serial cable. Configure the transceiver’s CAT control settings to enable communication with your digital mode software.
Ensure the correct PTT (Push-To-Talk) settings are established for transmitting. Adjust the audio levels to optimize signal clarity for modes like PSK31 and RTTY. The manual details specific settings for various software packages, ensuring reliable digital communication. Proper grounding is crucial to minimize noise and interference.
Interface with a Computer for Digital Modes
The Yaesu FTDX10 offers versatile computer interfacing for seamless digital mode operation. Utilize the USB port for CAT control, allowing software to adjust frequency and mode. A dedicated audio interface connects for transmitting and receiving digital signals.
The manual provides detailed instructions for configuring virtual COM ports and selecting the appropriate data rates. Ensure proper driver installation for optimal performance. Software compatibility includes popular programs like WSJT-X and FLDIGI, enhancing your digital communication capabilities.
Software Compatibility and Configuration
The FTDX10 demonstrates excellent compatibility with a wide range of digital mode software. Popular choices like WSJT-X, FLDIGI, and Ham Radio Deluxe are readily supported, offering diverse operating experiences.
The manual details specific configuration settings for each program, including CAT control setup and audio interface parameters. Proper configuration ensures seamless communication between the radio and your computer. Driver installation and virtual COM port assignment are crucial steps for successful operation.
Troubleshooting Common Issues
This section provides solutions for typical problems, including power failures, transmission difficulties, and receive issues, referencing the ftdx10 manual for detailed guidance.
No Power – Troubleshooting Steps
If the FTDX10 fails to power on, first verify the power cable is securely connected to both the transceiver and a functioning AC outlet. Check the fuse located on the rear panel; a blown fuse indicates a potential internal issue requiring professional attention.
Confirm the correct voltage selector switch setting matches your local power supply. If these steps don’t resolve the issue, consult the ftdx10 manual’s troubleshooting section for further diagnostics, or contact Yaesu support for assistance. Avoid attempting internal repairs yourself.
Transmission Problems – Diagnosis and Solutions
If experiencing transmission issues, initially confirm the microphone is properly connected and functioning correctly. Verify the correct transmit mode is selected (SSB, FM, etc.). Check antenna connections for looseness or damage; a poor antenna match can reduce output power.
Consult the ftdx10 manual for SWR (Standing Wave Ratio) adjustment procedures. High SWR can indicate antenna problems or transceiver issues. If problems persist, review the transceiver’s transmit settings and seek guidance from the manual or Yaesu support.
Receive Issues – Identifying and Fixing Problems
Troubleshooting receive problems begins with verifying antenna connections and ensuring the antenna is appropriate for the desired frequency. Confirm the correct mode (SSB, FM, CW) is selected, as incorrect mode selection results in garbled audio. Check the RF Gain and SQL (Squelch) settings; excessive squelch can block weak signals.
Refer to the ftdx10 manual for detailed explanations of receiver settings. Investigate potential interference sources and utilize the transceiver’s noise reduction features. If issues remain, consult the manual or Yaesu support for advanced diagnostics.

Maintenance and Care
Regular cleaning and firmware updates ensure optimal performance and longevity of your FTDX10. The manual details proper procedures for both, alongside storage guidelines.
Cleaning the FTDX10
To maintain the FTDX10’s pristine condition and ensure reliable operation, regular cleaning is essential. Always disconnect the transceiver from the power source before commencing any cleaning procedures. Use a soft, dry cloth to gently wipe down the exterior surfaces, removing dust and fingerprints. Avoid using abrasive cleaners, solvents, or excessive moisture, as these can damage the finish or internal components.
For stubborn dirt, lightly dampen the cloth with a mild detergent solution, ensuring it’s wrung out thoroughly to prevent liquid ingress. Pay particular attention to the front panel, knobs, and connectors. Clean the ventilation openings periodically to prevent dust buildup, which can lead to overheating. The manual provides detailed guidance on safe cleaning practices.
Firmware Updates and Procedures
Maintaining up-to-date firmware is crucial for optimal FTDX10 performance and access to the latest features. Yaesu periodically releases firmware updates to address bugs, enhance functionality, and improve stability. Download the latest firmware from the official Yaesu website and carefully follow the instructions provided in the accompanying documentation.
Typically, updates involve transferring the firmware file to a USB drive and then initiating the update process through the transceiver’s menu system. Never interrupt the update process, as this could render the unit inoperable. The manual details the complete firmware update procedure.
Storage and Transportation Guidelines
Proper storage and transportation are essential to protect your Yaesu FTDX10 from damage. When storing the transceiver for extended periods, disconnect the power supply and antenna. Store it in a clean, dry environment, away from extreme temperatures, humidity, and direct sunlight.
For transportation, use the original packaging whenever possible, or a suitably padded case to prevent shock and vibration damage. Secure the transceiver to prevent movement during transit. Avoid exposing the unit to excessive dust or moisture during storage or transport.
Technical Specifications
The FTDX10 boasts a wide frequency coverage, robust power output, and exceptional receiver performance. Detailed specifications are crucial for optimal operation.
Frequency Coverage
The Yaesu FTDX10 provides extensive frequency coverage, enabling operation across a broad spectrum of amateur radio bands. It encompasses 100 kHz – 56 MHz, including HF bands from 1.8 MHz to 54 MHz, and the 50 MHz band.
This wide range allows for participation in various modes and activities. Coverage includes the 160m, 80m, 40m, 30m, 20m, 17m, 15m, 12m, 10m, 6m, and 2m bands. The receiver’s performance is consistent across this entire spectrum, ensuring reliable communication.
Power Output
The Yaesu FTDX10 is capable of delivering a robust 100 watts of RF power across all amateur bands. This substantial output ensures reliable communication over significant distances. Power output is adjustable, allowing operators to tailor transmission strength to specific conditions and requirements.
The transceiver features an efficient final amplifier design, maximizing power transfer and minimizing distortion. Precise power output control is facilitated by the front panel meter and settings, ensuring compliance with regulations.
Receiver Sensitivity and Selectivity
The FTDX10 boasts exceptional receiver performance, crucial for weak signal reception. Its sensitivity allows for decoding faint transmissions, while excellent selectivity effectively rejects unwanted interference. This combination ensures clear and intelligible audio even in challenging environments.
Advanced filtering options, including IF filters, further enhance selectivity, enabling operators to isolate desired signals. The receiver’s dynamic range handles strong signals without desensitizing to weaker ones, providing a superior listening experience.

Resources and Support
Yaesu’s website offers comprehensive manuals and downloads. Online forums and communities provide peer support, while direct contact with Yaesu support is available;
Yaesu Website and Manual Downloads
The official Yaesu website is the primary source for all FTDX10 documentation. Users can find the complete operating manual in PDF format, offering detailed instructions on every aspect of the transceiver.
Additionally, Yaesu frequently provides updated firmware, software drivers, and helpful supplemental materials. These downloads ensure optimal performance and access to the latest features.
Registration on the Yaesu website may be required to access certain resources, but it allows for easy tracking of updates and direct support requests. Explore the support section thoroughly!
Online Forums and Communities
Numerous online forums and communities are dedicated to Yaesu radios, including the FTDX10. These platforms provide a valuable space for users to share experiences, ask questions, and troubleshoot issues collaboratively.
Experienced operators often offer advice on optimizing settings, understanding advanced features, and resolving common problems.
Searching these forums can reveal solutions to specific challenges and provide insights beyond the official manual. Active participation fosters learning and enhances the ownership experience.
Contacting Yaesu Support
For direct assistance with your FTDX10, reaching Yaesu Support is crucial for complex issues not addressed in the manual or online forums. The official Yaesu website provides contact information, including phone numbers and email addresses for various regions.
Be prepared to provide your radio’s serial number and a detailed description of the problem.
Prompt and accurate information will expedite the support process, ensuring a swift resolution to your concerns and maximizing your radio’s performance.