
Star Wars: Shatterpoint Assembly Instructions ⸺ Comprehensive Plan
This comprehensive guide details assembling Star Wars: Shatterpoint miniatures, utilizing official Atomic Mass Games instructions and community resources like ManualsLib and Bell of Lost Souls․
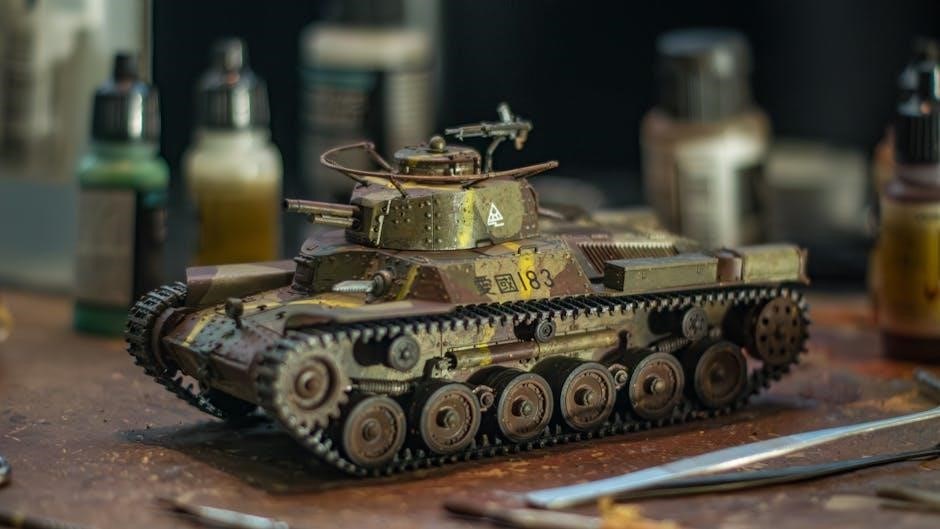
Star Wars: Shatterpoint introduces a compelling tabletop skirmish experience, featuring highly detailed miniatures representing iconic characters from the galaxy far, far away․ These miniatures require assembly, offering hobbyists a rewarding build process․ Atomic Mass Games provides comprehensive assembly diagrams, readily available for download, showcasing each miniature’s components and construction sequence․
Understanding the intricacies of these miniatures – from Logray and Wicket to C-3PO and Obi-Wan Kenobi – is crucial for successful assembly․ The game emphasizes strategic positioning and character abilities, making proper miniature construction vital for gameplay and visual appeal․ Resources like ManualsLib and Bell of Lost Souls further aid in navigating the assembly process․
Understanding Assembly Diagrams
Assembly diagrams are essential for constructing your Star Wars: Shatterpoint miniatures․ Atomic Mass Games provides detailed visual guides, illustrating each step of the building process․ These diagrams showcase sprue layouts, identifying individual parts and their corresponding locations․
Carefully studying these diagrams before commencing assembly is highly recommended․ They highlight component connections, pose options, and potential customization opportunities․ Bell of Lost Souls offers a showcase of these diagrams, providing a clear overview of the assembly process․ Understanding the diagrams ensures accurate construction and maximizes the visual impact of your miniatures, enhancing your gaming experience․
Required Tools and Materials
Assembling your Star Wars: Shatterpoint miniatures requires specific tools for optimal results․ A hobby knife is crucial for carefully removing mold lines from plastic components, ensuring clean and precise assembly․ Plastic glue, specifically designed for polystyrene, is essential for bonding the miniature parts together․
Selecting the right type of plastic glue is important; thin, fast-drying glues are often preferred․ Additional helpful materials include sprue cutters, tweezers for handling small parts, and a cutting mat to protect your work surface․ Prior preparation with these tools streamlines the building process․
Hobby Knife for Mold Line Removal

A sharp hobby knife is indispensable for preparing Star Wars: Shatterpoint miniatures․ Mold lines, remnants from the plastic injection molding process, detract from the miniature’s detail and must be removed․ Carefully scrape along the mold lines with the knife, using light pressure to avoid damaging the plastic․
Multiple light passes are more effective than attempting to remove the lines in a single stroke․ Always cut away from yourself for safety․ Patience is key; a clean removal enhances the final painted appearance․ Remember to exercise caution when handling the blade․
Plastic Glue – Recommended Types
For assembling your Star Wars: Shatterpoint miniatures, plastic glue specifically formulated for polystyrene is essential․ Tamiya Extra Thin Cement and Plastic Welders Association’s (PWA) glue are highly recommended by model builders․ These glues melt the plastic together, creating a strong and durable bond․
Avoid using super glue (cyanoacrylate) as it can become brittle and doesn’t fuse the plastic․ Apply a small amount of glue to the joining surfaces; excessive glue can create a messy finish․ Ensure proper ventilation during use․
General Assembly Tips
Successful Star Wars: Shatterpoint miniature assembly relies on careful preparation and technique․ Always begin by carefully cleaning mold lines with a sharp hobby knife to ensure smooth surfaces and accurate fits․ Before applying any glue, meticulously dry-fit each component to identify potential issues and ensure proper alignment․
Remember to use minimal glue – a small amount is sufficient to create a strong bond․ Avoid excessive application, which can lead to messy results and obscured details․ Patience and precision are key to achieving a high-quality finish․
Cleaning Mold Lines
Removing mold lines is crucial for a professional-looking Star Wars: Shatterpoint miniature․ These thin ridges are remnants from the plastic molding process and detract from the final appearance․ Employ a sharp hobby knife, held at a shallow angle, to carefully scrape away the excess material․
Gentle, controlled strokes are preferred over forceful scraping to prevent accidental damage to the miniature’s details․ Take your time and inspect each part thoroughly under good lighting․ A clean miniature ensures a better glue bond and a superior paint finish․
Dry-Fitting Components Before Gluing

Before applying any adhesive, meticulously dry-fit each component together․ This vital step, emphasized in the official Obi-Wan Kenobi assembly guide from Atomic Mass Games, reveals potential fit issues or misalignments․ Carefully test how the parts connect, identifying areas that require slight adjustments or cleaning․
Dry-fitting prevents irreversible errors and ensures a seamless assembly․ It allows you to visualize the final product and confirm the pose you desire․ Addressing fit problems before gluing saves time, frustration, and potential damage to your Star Wars: Shatterpoint miniatures․
Using Minimal Glue for Optimal Results
Applying a controlled amount of plastic glue is crucial for a clean and durable Star Wars: Shatterpoint miniature assembly․ As highlighted in Atomic Mass Games’ instructions, particularly for Obi-Wan Kenobi, use a small amount – less is often more! Excessive glue creates a messy appearance and can obscure details․
Capillary action will distribute the glue effectively․ Avoid large blobs; instead, focus on applying it to joining surfaces․ This technique prevents unwanted residue and ensures a strong, yet subtle, bond․ Minimal glue also reduces the risk of warping or damaging delicate components during the assembly process․
Character-Specific Assembly Guides
Detailed assembly instructions are available for each Star Wars: Shatterpoint character, provided by Atomic Mass Games and showcased on platforms like ManualsLib․ Specific guides exist for Logray, Wicket, C-3PO, and Ewoks (SWP39), each outlining unique component arrangements․
These guides detail the precise order of assembly, ensuring proper fit and pose․ Furthermore, the Obi-Wan Kenobi (SWP06(A)) guide emphasizes initial cleaning of mold lines․ Bell of Lost Souls also presents assembly diagrams, visually demonstrating the process․ Refer to these resources for character-specific nuances and optimal building techniques․

Logray Assembly Instructions
The Logray assembly, identified as SWP39, requires careful attention to detail, as outlined in the official Atomic Mass Games instructions available on ManualsLib․ Begin by meticulously cleaning mold lines from all components using a sharp hobby knife, ensuring a smooth finish․
Dry-fitting parts before applying glue is crucial for verifying alignment․ The guide details the specific order for attaching Logray’s staff, limbs, and head․ Use a minimal amount of plastic glue to secure each piece, avoiding excess that could obscure details․ Refer to Bell of Lost Souls for visual aid․
Wicket Assembly Instructions

Assembling Wicket (SWP39) demands precision, referencing the Atomic Mass Games instructions found on ManualsLib․ Start by carefully removing mold lines from each component with a hobby knife, ensuring clean edges for optimal adhesion․ Dry-fitting is essential to confirm proper part alignment before applying any adhesive․
Utilize a small amount of plastic glue when attaching Wicket’s arms, legs, and head, avoiding overflow․ The instructions detail the correct sequence for assembling his unique weaponry and accessories․ Bell of Lost Souls provides helpful diagrams showcasing assembly options and potential customizations․
C-3PO Assembly Instructions
Constructing C-3PO (SWP39) requires meticulous attention to detail, guided by Atomic Mass Games’ official assembly diagrams available via ManualsLib․ Begin by carefully removing mold lines from all parts using a sharp hobby knife – precision is key for this protocol droid! Dry-fitting each component before gluing ensures a seamless fit․
Apply minimal plastic glue to connect C-3PO’s body sections, legs, and head, avoiding excess․ The instructions illustrate the correct placement of his intricate details․ Resources like Bell of Lost Souls offer visual aids for complex assembly steps and potential posing options․
Ewok Assembly Instructions
Assembling the Ewok (SWP39) miniatures demands careful mold line removal with a hobby knife, as detailed in Atomic Mass Games’ guides on ManualsLib․ Dry-fitting is crucial to ensure proper alignment of the Ewok’s furry body, limbs, and head before applying plastic glue․
Use a small amount of glue to avoid obscuring details․ The assembly diagrams showcase various Ewok weapon and accessory options․ Bell of Lost Souls provides helpful visual references for complex parts and potential dynamic poses․ Pay close attention to the instructions for attaching the Ewok’s distinctive headpiece․
Obi-Wan Kenobi Assembly Guide
The Obi-Wan Kenobi (SWP06(A)) miniature requires meticulous assembly, beginning with carefully removing mold lines using a sharp hobby knife – a step emphasized by Atomic Mass Games’ documentation on ManualsLib․ Prior to gluing, thoroughly check the fit of each component, including his robes, arms, and lightsaber hand․
Apply a minimal amount of plastic glue to maintain detail and avoid unsightly residue․ Assembly diagrams, showcased by Bell of Lost Souls, illustrate pose options․ Ensure the lightsaber is securely attached and aligned correctly for optimal presentation․
Component Identification
Successfully assembling Star Wars: Shatterpoint miniatures begins with accurate component identification․ Each miniature, like Logray, Wicket, or C-3PO, arrives on sprues – plastic frames holding individual parts․ Understanding the sprue layouts, detailed in Atomic Mass Games’ assembly diagrams (available via ManualsLib and Bell of Lost Souls), is crucial․
Carefully examine each part, comparing it to the provided instructions․ Identify arms, legs, heads, weapons, and any unique accessories․ Recognizing these miniature parts before attempting assembly prevents errors and ensures a smooth building process․

Identifying Miniature Parts
Accurate identification of miniature parts is paramount for a successful build․ Each component, whether for Logray, Wicket, C-3PO, or Obi-Wan Kenobi, has a specific purpose and location․ Refer to the Atomic Mass Games assembly instructions – readily available on ManualsLib – to visually match parts to diagrams․
Pay close attention to subtle differences in shape and size․ Arms are distinct from legs, and weapon components differ significantly․ Bell of Lost Souls showcases detailed assembly diagrams, aiding in part recognition; Proper identification prevents misassembly and ensures your miniature accurately reflects the character․
Understanding Sprue Layouts
Sprue layouts are the framework holding miniature parts, and understanding them streamlines assembly․ Atomic Mass Games organizes parts efficiently on each sprue, grouping components for specific characters or assemblies․ Familiarize yourself with the layout before clipping parts – diagrams on ManualsLib are invaluable here․
Recognize how parts connect to the sprue and plan your clipping strategy․ Bell of Lost Souls’ assembly showcases often highlight sprue layouts․ Careful observation minimizes stress on delicate parts during removal․ Knowing the layout also helps locate specific components quickly, accelerating the building process․
Advanced Assembly Techniques
Beyond basic gluing, advanced techniques elevate your Shatterpoint miniatures․ Pose options are plentiful; carefully consider dynamic stances before cementing joints․ Customization is encouraged – minor conversions can personalize your units․ Attaching small details, like weapon accessories or pouches, requires precision and minimal glue․
Pinning can reinforce fragile connections, especially for heavier components․ Utilize green stuff or liquid plastic to fill gaps and create seamless transitions; Practice these techniques on spare parts first․ Bell of Lost Souls showcases inspiring conversions, offering ideas for advanced builders․
Pose Options and Customization
Shatterpoint miniatures offer diverse pose options during assembly, allowing for dynamic battlefield displays․ Before gluing, experiment with different arm and leg positions to capture character personality․ Consider the miniature’s intended movement or attack․ Customization extends beyond posing; skilled hobbyists can convert parts․
Swap weapons, alter head positions, or add scenic basing elements․ Bell of Lost Souls provides inspiration for conversions․ Remember to maintain balance and structural integrity when modifying components․ Careful planning and precise cuts are essential for successful customization․
Attaching Small Details
Attaching small details to Shatterpoint miniatures requires precision and patience․ Utilize a fine-tipped applicator or toothpick to apply minimal plastic glue directly to the contact point․ Avoid excessive glue, which can obscure detail or create a messy appearance․ Hold the detail in place gently until the glue begins to set․
Consider using a magnifying glass for improved visibility․ For particularly delicate parts, a tiny drop of super glue can provide a faster, stronger bond, but exercise caution․ Ensure proper alignment before the glue fully cures, as adjustments become difficult․
Troubleshooting Assembly Issues
Encountering issues during Shatterpoint assembly is common․ Difficult fits often require careful cleaning of mold lines and slight filing of connecting parts – test fit repeatedly! Broken parts can usually be repaired with plastic glue; apply sparingly and clamp until fully cured․ If a joint is weak, consider reinforcing it with a small piece of plastic sprue․
Gaps can be filled with modeling putty, smoothed, and then primed․ Remember to always dry-fit components before applying glue to identify potential problems․ Patience and a steady hand are key to resolving assembly challenges․
Dealing with Difficult Fits
Difficult fits in Shatterpoint miniatures often stem from lingering mold lines or slight warping of plastic․ Carefully clean all connecting surfaces with a sharp hobby knife, removing any excess material․ Gentle filing can further refine the fit, but avoid over-sanding․ Test-fit repeatedly before applying glue, and consider slightly bending the plastic (with caution!) to achieve a better connection․
If a fit remains tight, a tiny amount of lubricant, like petroleum jelly, can aid assembly․ Remember, forcing parts can cause breakage, so patience is crucial․
Repairing Broken Parts
Accidental breakage during assembly happens! For clean breaks, apply plastic glue to both surfaces, holding them firmly together until set․ Reinforce the joint with a small amount of glue on the exterior, creating a subtle bead․ More complex breaks may require pinning – drilling small holes and inserting a piece of wire for added strength․
Avoid using super glue, as it can become brittle․ Allow ample drying time before handling the repaired miniature․ Careful application and patience are key to restoring your Shatterpoint figures․

Painting Preparation
Proper preparation is crucial for a stunning finish! Begin by ensuring all miniatures are fully assembled and any mold lines are meticulously removed․ Next, cleaning the plastic with mild soapy water removes oils that hinder paint adhesion․ Priming is essential; use a spray primer designed for plastic miniatures, applying thin, even coats․
Choose a primer color appropriate for your scheme – black for darker tones, white or grey for brighter ones․ Allow the primer to fully dry before painting․ This step provides a uniform surface for paint and enhances detail․

Priming the Miniatures
Priming creates a vital bond between the plastic and your paint, ensuring longevity and vibrant colors․ Select a spray primer specifically formulated for plastic miniatures; acrylic-based primers are generally recommended; Apply in thin, even coats, avoiding pooling or obscuring details․ Hold the can approximately 8-12 inches away and use sweeping motions․
Consider the primer color based on your desired paint scheme – black enhances shadows, white brightens highlights, and grey offers a neutral base․ Allow ample drying time, typically 24 hours, before proceeding to painting․ Proper priming prevents paint from chipping and improves overall finish quality․
Resources and Downloads
Atomic Mass Games’ official website is the primary source for all things Shatterpoint, including downloadable assembly diagrams and rules updates․ ManualsLib provides a convenient database hosting PDF versions of assembly instructions for various sets, like Logray (SWP39)․ Bell of Lost Souls showcases assembly diagrams, offering visual guidance and community insights․
These resources are invaluable for navigating the assembly process, especially for complex miniatures․ Direct links to these sites ensure easy access to the latest information․ Regularly check for updates as Atomic Mass Games releases new expansions and clarifies assembly steps․
Atomic Mass Games Official Website
The Atomic Mass Games website serves as the central hub for Star Wars: Shatterpoint information․ Here, you’ll find the most current and official assembly diagrams for all released miniatures, including those from expansion sets․ Regular updates ensure you have access to the latest instructions and errata․
Beyond assembly guides, the site offers comprehensive rules documentation, lore details, and announcements regarding future releases․ It’s the definitive source for staying informed about the game and accessing essential resources for a smooth assembly experience․ Check frequently for new content!
ManualsLib – Assembly Instructions Database

ManualsLib provides a readily accessible database hosting PDF downloads of Star Wars: Shatterpoint assembly instructions․ This is particularly useful for quickly locating guides for specific miniatures like Logray, Wicket, C-3PO, and Ewoks, or for Obi-Wan Kenobi․ The platform’s search functionality allows for easy navigation through the available documentation․
Offering a convenient alternative to navigating the Atomic Mass Games website, ManualsLib ensures you can always find the instructions you need, even offline․ It’s a valuable resource for players seeking a centralized location for all assembly manuals․ Download and save for easy access!
Community Resources
Beyond official sources, the Star Wars: Shatterpoint community offers invaluable assembly support․ Bell of Lost Souls, for example, showcases detailed assembly diagrams for all miniatures, providing visual guidance and highlighting available options․ These diagrams are a fantastic supplement to the official instructions, especially for complex builds․
Online forums and social media groups are also brimming with helpful tips, troubleshooting advice, and customization ideas from fellow players․ Leveraging this collective knowledge can significantly enhance your assembly experience․ Don’t hesitate to ask questions and share your own discoveries with the community!
Bell of Lost Souls – Assembly Diagram Showcase
Bell of Lost Souls provides a comprehensive showcase of Star Wars: Shatterpoint miniature assembly diagrams, directly from Atomic Mass Games․ This resource visually details how to build each miniature, including all the different assembly options available․ It’s an excellent aid for understanding the sprue layouts and identifying miniature parts before you begin gluing․
The diagrams clearly illustrate each step of the process, making it easier to follow along, even for beginners․ You can download these guides directly from their website, offering a convenient and accessible resource for all your assembly needs․ It’s a must-visit for visual learners!
Expansion Set Assembly Considerations
As Star Wars: Shatterpoint evolves, expansion sets introduce new miniatures and potentially altered assembly processes․ Players should carefully review the specific instructions included with each expansion, as techniques may differ from the core set․ Consider player feedback incorporated into expansion designs, potentially influencing component fit or posing options․
Be mindful of unique parts exclusive to expansions, requiring careful identification and placement․ Always dry-fit components before applying glue, ensuring a secure and aesthetically pleasing result; Expansion sets often offer customization options, so plan your assembly accordingly!
Future Updates and New Releases
Atomic Mass Games continually refines Star Wars: Shatterpoint, promising future updates to assembly instructions and new miniature releases․ Stay informed through the official Atomic Mass Games website for the latest documentation and announcements․ Expect potential revisions to assembly techniques based on community feedback and design improvements․
New releases may introduce innovative component designs or assembly challenges, requiring adaptable skills․ Monitor community forums and resources like Bell of Lost Souls for shared experiences and tips․ Anticipate expanded customization options with each release, enhancing the personalization of your miniatures!
Safety Precautions During Assembly
Prioritize safety when assembling Star Wars: Shatterpoint miniatures․ Always use a sharp hobby knife with extreme caution, employing a cutting mat and avoiding forceful pressure․ Plastic glue contains volatile chemicals; ensure adequate ventilation and avoid inhalation․ Keep glue away from eyes and skin, and wash hands thoroughly after use․
Small parts pose a choking hazard; keep miniatures and components away from young children․ Dispose of excess plastic and glue responsibly, following local regulations․ Work in a well-lit area to prevent eye strain and ensure precise assembly․ Take breaks to avoid fatigue and maintain focus․