Craftsman Snowblower Manual: A Comprehensive Guide
Navigating Craftsman snowblower maintenance requires identifying model and serial numbers. These are typically found on a sticker located on the frame, near the engine, or auger housing.
Understanding Craftsman Snowblower Model and Serial Numbers
Craftsman snowblower identification hinges on understanding the model and serial numbers. These aren’t just random strings of characters; they’re crucial for parts ordering, troubleshooting, and determining the manufacturing date of your machine. The model number, typically an 11-character code, identifies the specific snowblower design. It often begins with a three-digit prefix, like 536 or 944, which indicates the original equipment manufacturer (OEM).
The serial number, usually found alongside the model number, provides information about when your snowblower was produced. For models with serial numbers starting with four digits, a specific pattern can reveal the year of manufacture – potentially 1985, 1995, or 2005, requiring you to consider the snowblower’s styling and features to pinpoint the correct year. Locating these numbers is the first step in any maintenance or repair process. They are commonly found on a sticker on the rear of the frame, the side of the auger housing, or near the engine mounting points. Accurate identification ensures you obtain the correct parts and access the appropriate service information.
Locating the Model Number on Your Snowblower
Finding your Craftsman snowblower’s model number is the essential first step for any maintenance or repair. It’s typically located on a sticker or metallic tag affixed to the machine. The most common location is on the backside of the metal base, positioned between the left and right rear wheels. Carefully inspect this area first.
However, don’t limit your search to just that spot. Also, check the rear of the frame itself, and the side of the auger housing. The model number is often near the engine mounting area as well. If the sticker is damaged or unreadable, a thorough search of these areas is crucial. The number is usually an 11-character code. If you still struggle to locate it, consider the snowblower’s styling, controls, and labeling – these visual cues can help narrow down the possibilities when searching online parts diagrams. A clear model number is vital for ordering the correct replacement parts and accessing the appropriate service manuals.
Decoding Craftsman Model Number Prefixes (e.g., 536, 944)
Craftsman model numbers aren’t random; the initial three-digit prefix reveals the original equipment manufacturer (OEM). Understanding this code is key to sourcing compatible parts and accurate information. For instance, a model number starting with ‘944’ indicates that the snowblower was originally manufactured by a specific OEM – in this case, 944.524590 is a complete example.
Similarly, model numbers beginning with ‘536’ often follow a specific serial number format where the production date is embedded within the first four digits of the serial number. This can help estimate the snowblower’s age. Deciphering these prefixes isn’t always straightforward, as Craftsman has utilized various manufacturers over the years. However, knowing the prefix narrows down the search considerably. It’s important to remember that a prefix like ‘536’ might point to a production year of 1985, 1995, or 2005, requiring further investigation using the full serial number and the snowblower’s physical characteristics to pinpoint the exact year of manufacture.
Using the Serial Number to Determine Manufacturing Date
The serial number is crucial for pinpointing your Craftsman snowblower’s manufacturing date. For many Craftsman models, particularly those with model numbers starting with ‘536’, the first four digits of the serial number encode the production date. This isn’t a universal rule, but a common pattern. Deciphering this code requires careful attention.
If the serial number begins with four digits, it’s likely formatted to indicate the year of manufacture. However, it’s not a direct year representation. For example, a serial number starting with ‘1985’ doesn’t necessarily mean the snowblower was made in 1985; it could be 1995 or even 2005. Context is key! Examining the snowblower’s styling, controls, and labeling alongside the serial number helps determine which year makes the most sense. If the serial number doesn’t follow this four-digit pattern, or if the prefix isn’t ‘536’, determining the date becomes more challenging and may require consulting Sears PartsDirect or contacting a landscape equipment professional.
The Significance of the Engine Model Number
The engine model number is paramount when sourcing parts and understanding your Craftsman snowblower’s power source. It’s a unique identifier for the engine itself, distinct from the snowblower’s overall model number. This number is essential for ordering the correct replacement parts, such as carburetors, filters, or spark plugs.
Craftsman frequently utilized Tecumseh engines, meaning many engine model numbers will be Tecumseh numbers. Knowing this simplifies the parts search, as Tecumseh parts are widely available. Locating the engine model number usually involves checking a sticker directly on the engine, often near the flywheel or carburetor. It’s typically a combination of numbers and letters.
Having both the engine model and specification number is ideal, especially when seeking assistance from a landscape equipment shop. These numbers together provide a complete picture of the engine’s configuration, ensuring accurate part identification and compatibility. Without the correct engine model number, you risk ordering incorrect parts, leading to frustration and delays.
Identifying the Engine Manufacturer (Tecumseh Commonality)
Determining the engine manufacturer is crucial for parts sourcing and repair information. While Craftsman assembled the snowblowers, they often outsourced the engines. A very common engine supplier for Craftsman snowblowers was Tecumseh – a prevalence that significantly simplifies many repair processes.
If your Craftsman snowblower’s engine doesn’t have obvious branding, the engine model number is your key to identification. A quick online search using the engine model number will almost certainly reveal if it’s a Tecumseh engine. This is beneficial because Tecumseh parts are readily available through various retailers, including Sears PartsDirect and dedicated Tecumseh parts suppliers.
The widespread use of Tecumseh engines means that many repair guides and online resources specifically cater to these engines. Knowing you have a Tecumseh allows you to leverage this wealth of information. Even if another manufacturer was used, identifying it first narrows down the search for compatible parts and troubleshooting guides, saving time and effort.
Accessing Craftsman Parts Diagrams and Manuals Online

Locating parts diagrams and manuals is essential for successful Craftsman snowblower maintenance and repair. Fortunately, numerous online resources provide access to this vital information. Sears PartsDirect (searspartsdirect.com) is a primary source, offering exploded views of your snowblower, allowing you to identify specific components and their corresponding part numbers.
To utilize Sears PartsDirect effectively, you’ll need your snowblower’s model number. Once entered, the site displays detailed diagrams categorized by assembly – auger, drive system, engine, and more. These diagrams are invaluable for understanding how parts fit together and for ordering replacements.
Beyond Sears PartsDirect, various third-party websites archive older manuals and diagrams. Searching online using your model number combined with terms like “parts list” or “repair manual” can yield helpful results. Remember to verify the accuracy of information from unofficial sources. Having access to these resources empowers you to tackle repairs confidently and efficiently.
Sears PartsDirect: A Resource for Craftsman Snowblower Parts
Sears PartsDirect (searspartsdirect.com) stands as a cornerstone resource for Craftsman snowblower owners seeking replacement parts. This platform provides a comprehensive catalog specifically tailored to Craftsman equipment, simplifying the often-complex process of finding the correct components.
The key to successful parts sourcing on Sears PartsDirect lies in accurate model number input. Once your snowblower’s model number is entered, the website generates interactive parts diagrams. These diagrams visually represent your machine’s assemblies, allowing you to pinpoint the exact part you need.
Beyond diagrams, Sears PartsDirect offers detailed part descriptions, pricing, and availability information. You can easily add parts to your cart and proceed with a secure online purchase. The site frequently features promotions and discounts, potentially saving you money on repairs. While finding the year can be tricky, focusing on the model and part numbers ensures compatibility. It’s a reliable and convenient solution for maintaining your Craftsman snowblower.
Common Craftsman Snowblower Problems & Troubleshooting
Craftsman snowblowers, while durable, can experience common issues. Carburetor problems frequently arise, often stemming from stale fuel or a clogged carburetor. Symptoms include difficult starting or rough running. Cleaning or rebuilding the carburetor is often necessary.
Auger and impeller maintenance is crucial. Inspect for wear, damage, or obstructions. Regularly check and replace shear pins – these are designed to break under stress, protecting the auger and gearbox. A broken shear pin indicates a significant impact, requiring investigation.
Drive system issues, like slipping belts or damaged gears, can hinder movement. Inspect belts for wear and proper tension. Electrical problems, particularly starting issues, may involve a faulty solenoid, switch, or wiring. Finally, always prioritize safety; disconnect the spark plug before any maintenance. Addressing these common problems proactively extends your snowblower’s lifespan.
Carburetor Issues: A Frequent Concern
Carburetor problems represent a significant portion of Craftsman snowblower repairs. Stale fuel is a primary culprit, causing varnish buildup that restricts fuel flow. Symptoms manifest as difficult starting, especially after storage, or an engine that runs erratically.
Often, a simple carburetor cleaning can resolve the issue. Disassemble the carburetor, carefully noting the position of all parts. Use carburetor cleaner to dissolve varnish and debris, paying close attention to jets and passages. Compressed air can help clear obstructions.
In more severe cases, a carburetor rebuild may be necessary, replacing gaskets, seals, and potentially the needle valve. Many Craftsman snowblowers utilize Tecumseh engines, and carburetors are often interchangeable with those found on other Tecumseh-powered equipment. Always consult a parts diagram to ensure compatibility before ordering replacements. Proper fuel stabilizer use during storage can prevent future carburetor issues.
Auger and Impeller Maintenance
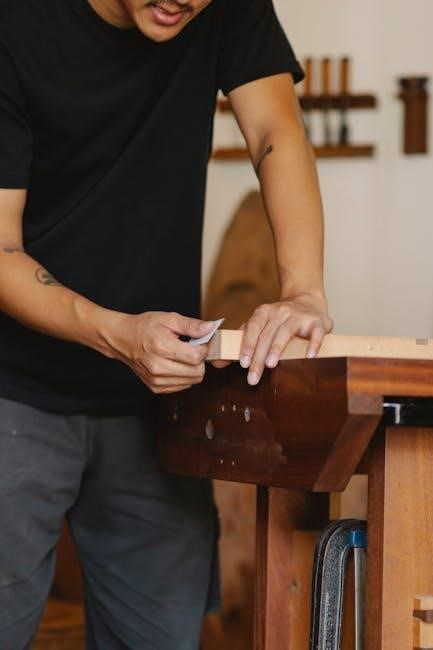
Regular inspection of the auger and impeller is crucial for efficient snow removal and preventing damage. Check for accumulated debris – stones, sticks, or ice – that can cause jamming or imbalance. Always disconnect the spark plug before performing any maintenance on these components!
Inspect the auger blades for wear, cracks, or bending. Sharpen dull blades to improve cutting performance, ensuring balance after sharpening to avoid vibration. Examine the impeller for similar damage; a damaged impeller reduces throwing distance and efficiency.
The shear pins, designed to protect the gearbox from damage during impacts with solid objects, should be checked regularly. Replace broken shear pins with the correct type – using incorrect pins can lead to more serious damage. Lubricate the auger gearbox according to the manufacturer’s recommendations to ensure smooth operation and prolong its lifespan. Proper maintenance extends the life of these vital components.
Shear Pins: Replacement and Prevention
Shear pins are sacrificial components designed to break upon impact with a hard object, protecting the auger gearbox from costly damage. Regularly inspect these pins before each use, and always keep spares on hand for quick replacement. Using the correct replacement pin is absolutely critical; never substitute with a bolt or stronger metal, as this defeats the safety mechanism.
Replacing a shear pin is straightforward: disconnect the spark plug, access the pin location (typically near the auger), and remove the broken pieces. Install the new pin, ensuring proper alignment. Prevention is key – avoid throwing snow onto gravel or hard surfaces, and be mindful of potential obstructions like rocks or ice chunks.
Consistent preventative measures, like raising the auger housing slightly when operating on uneven terrain, can significantly reduce the likelihood of shear pin failure. Remember, frequent shear pin breakage indicates a potential operating issue or hazardous snow conditions.
Drive System Maintenance (Belts, Gears)
Maintaining the drive system ensures efficient snow removal. Regularly inspect the drive belt for cracks, fraying, or excessive wear. A worn belt will slip, reducing traction and potentially causing damage to the transmission. Replacement is relatively simple, typically involving removing a cover and rerouting the belt around the pulleys.
The gearbox itself requires periodic attention. Check the oil level and condition; low or contaminated oil can lead to premature wear of the gears. Refer to your owner’s manual for the recommended oil type and change intervals. Listen for unusual noises during operation – grinding or clicking sounds may indicate gear damage.
Proper belt tension is crucial for optimal performance. Too loose, and it will slip; too tight, and it will strain the pulleys and belt. Ensure all pulleys are clean and free of debris. Addressing drive system issues promptly prevents more significant and costly repairs down the line.
Electrical System Checks (Starting Issues)
Troubleshooting starting problems often begins with the electrical system. First, inspect the spark plug – a fouled or damaged plug won’t ignite the fuel. Clean or replace it as needed, ensuring the correct gap. Check the spark plug wire for cracks or loose connections. Next, examine the battery; a weak battery may not provide sufficient power to the starter.
The solenoid is another common culprit. If it clicks but the starter doesn’t engage, the solenoid may be faulty. Test it with a multimeter to confirm. Inspect all wiring connections for corrosion or damage, paying close attention to the connections at the battery, solenoid, and starter. A loose or corroded connection can interrupt the electrical flow.
Don’t overlook the safety interlocks. These switches prevent the engine from starting unless certain conditions are met (e.g., handle engaged). A faulty interlock switch can prevent starting. Use a multimeter to test the continuity of these switches.
Oil Change Procedures and Recommended Oils
Regular oil changes are crucial for extending your Craftsman snowblower’s engine life. Before starting, ensure the engine is warm, but not hot, for optimal oil flow. Locate the oil drain plug, typically found on the lower part of the engine. Position a drain pan underneath to catch the used oil.
Remove the drain plug and allow the oil to drain completely. Once drained, reinstall the plug, tightening it securely. Next, locate the oil fill cap and add the recommended oil type and quantity. Craftsman snowblowers generally require SAE 30 oil for temperatures above 32°F (0°C), and SAE 5W-30 for colder temperatures.
Always check the engine’s manual for the precise oil capacity. After filling, use the dipstick to verify the oil level is within the recommended range – do not overfill. Properly dispose of the used oil at a designated recycling center. Consistent oil changes ensure smooth operation and prevent engine wear.
Fuel System Maintenance (Fuel Stabilizer, Drain)
Maintaining the fuel system is vital for preventing starting issues and ensuring reliable performance. Gasoline can degrade over time, leading to carburetor problems. To combat this, always add a fuel stabilizer to the gasoline, especially before storing the snowblower for extended periods like summer.

Fuel stabilizer prevents the formation of gum and varnish deposits within the fuel lines and carburetor. For long-term storage (over three months), it’s highly recommended to completely drain the fuel tank and carburetor. This eliminates the risk of fuel-related issues upon next use.
To drain the fuel, use a siphon pump or carefully tilt the snowblower while collecting the fuel in an approved container. After draining, run the engine briefly until it stalls to remove any remaining fuel from the carburetor. Store the snowblower in a well-ventilated area, away from flammable materials.
Safety Precautions When Servicing Your Snowblower
Prioritizing safety is paramount when servicing your Craftsman snowblower. Always disconnect the spark plug wire before performing any maintenance to prevent accidental starting. This simple step eliminates the risk of the engine engaging unexpectedly.
Wear appropriate personal protective equipment (PPE), including safety glasses or goggles, to shield your eyes from debris. Gloves are also recommended to protect your hands from sharp edges and chemicals. Never work on the snowblower while wearing loose clothing that could get caught in moving parts.
Ensure the snowblower is on a level surface and properly supported before lifting or tilting it. Be mindful of the auger and impeller blades, as they can cause serious injury. Avoid contact with these components at all times. If you are uncomfortable performing any repair, consult a qualified service technician.

Resources for Finding Specific Manuals by Engine Number
Locating manuals using your engine number is often the most precise method. Since Craftsman frequently utilized Tecumseh engines, starting your search with Tecumseh’s resources is highly recommended. Many online parts retailers and forums dedicated to small engine repair offer downloadable manuals based on engine model and spec numbers.
Sears PartsDirect, while focused on parts, often links to relevant documentation for specific models. Websites specializing in outdoor power equipment manuals frequently have searchable databases. Be prepared to input both the engine model and the specification number for accurate results.

If direct downloads prove difficult, consider contacting a landscape equipment shop – they often have access to extensive manual libraries. Online forums dedicated to Craftsman snowblowers can also be valuable, as members frequently share links and scans of older manuals. Remember to verify the manual’s compatibility with your specific engine configuration.